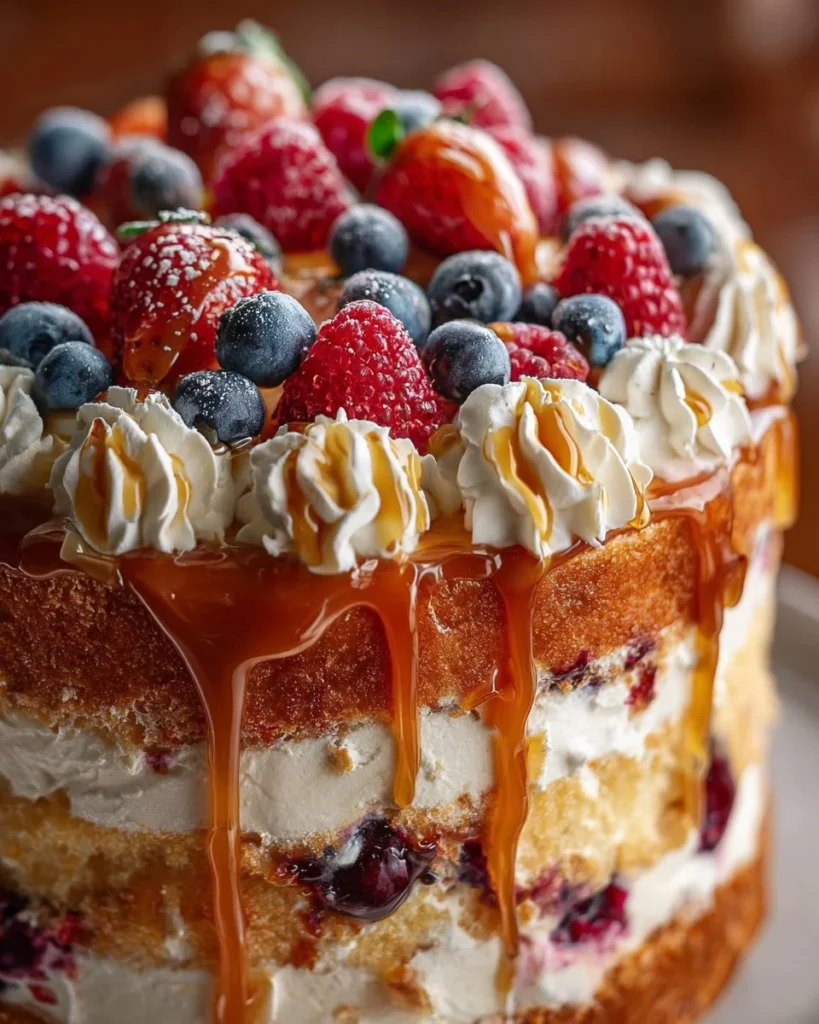

Heaven on Earth Cake: A Dreamy No-Bake Delight
There’s just something magical about desserts that require no baking. Maybe it’s the thought of skipping the oven altogether, especially on sweltering summer days when even turning on the stove feels like a punishment. Or perhaps it’s the sheer ease of whipping something together that feels fancy but is surprisingly quick and straightforward. Today, I want to share my favorite indulgence: the Heaven on Earth Cake. This dreamy no-bake treat is a staple in my household, and I can’t wait to tell you why.
I still remember the first time I decided to make this cake. It was a busy weeknight, and all I wanted was a sweet reward after a long day—like a slice of heaven to comfort my soul. So I grabbed my trusty off-brand instant vanilla pudding, some berries, and an angel food cake, and I dove right in. Spoiler alert: my first attempt did not go as planned. With a mischievous cat prowling around, curious toddlers tugging at my legs, and ingredients attempting to escape my clutches, it felt less like a kitchen and more like a chaotic circus. It was a mess, but as the luscious layers came together and the sweet aroma of vanilla filled the air, I realized something: chaos often breeds the best memories.
Once it settled in the fridge, something remarkable happened—the layers melded together, flavors danced harmoniously, and the entire mess turned into something beautiful. Oh, and let’s not forget: when I finally took my first bite, it was like tasting clouds. A light and fluffy embrace, full of berries, cream, and a hint of sweetness that felt like a well-deserved hug after a long day.
This cake not only matters to me due to my enthusiastic yet somewhat dramatic introduction to it, but also because it encapsulates the very essence of comfort food. It’s a dessert that elicits nostalgic ties to family gatherings, summer barbecues, and lazy Sunday afternoons while watching movies. Yes, this recipe feels like a hug in a bowl, and whether it’s a family potluck, a simple weeknight dinner, or a celebration, it fits right in everywhere.
Now, grab a cozy blanket, and let’s make some magic happen in your kitchen!
Why You’ll Love This Recipe
-
Super easy and quick: You can whip this together in under 30 minutes. Seriously. You might spend more time deciding what Netflix show to binge-watch next!
-
Perfect for picky eaters: I’ve yet to meet a child (or an adult, for that matter) who can resist the comforting sweetness of this cake. Berries? Pudding? Angel food cake? It’s hard to say no!
-
Leftover dreams come true: If you manage to have leftovers (which is a big if in my house), they only get better the next day as the flavors deepen.
-
Visual wow factor: Layered presentation in a trifle dish or large glass bowl is a show stopper. Your guests will definitely compliment your “culinary skills,” and you can just smile and nod because: “it was so easy!”
-
Make-ahead magic: It’s a great dessert to prepare in advance, making it perfect for gatherings or unexpected guests. What’s better than pulling out a stunning cake from the fridge when unexpected company drops by?
-
Sanctuary of flavors: Each bite is a delightful explosion of flavors and textures: creamy pudding, sweet fruit, and airy cake. It’s the kind of dessert that comforts you just as much as grandma’s stories do.
What Makes This Recipe Special?
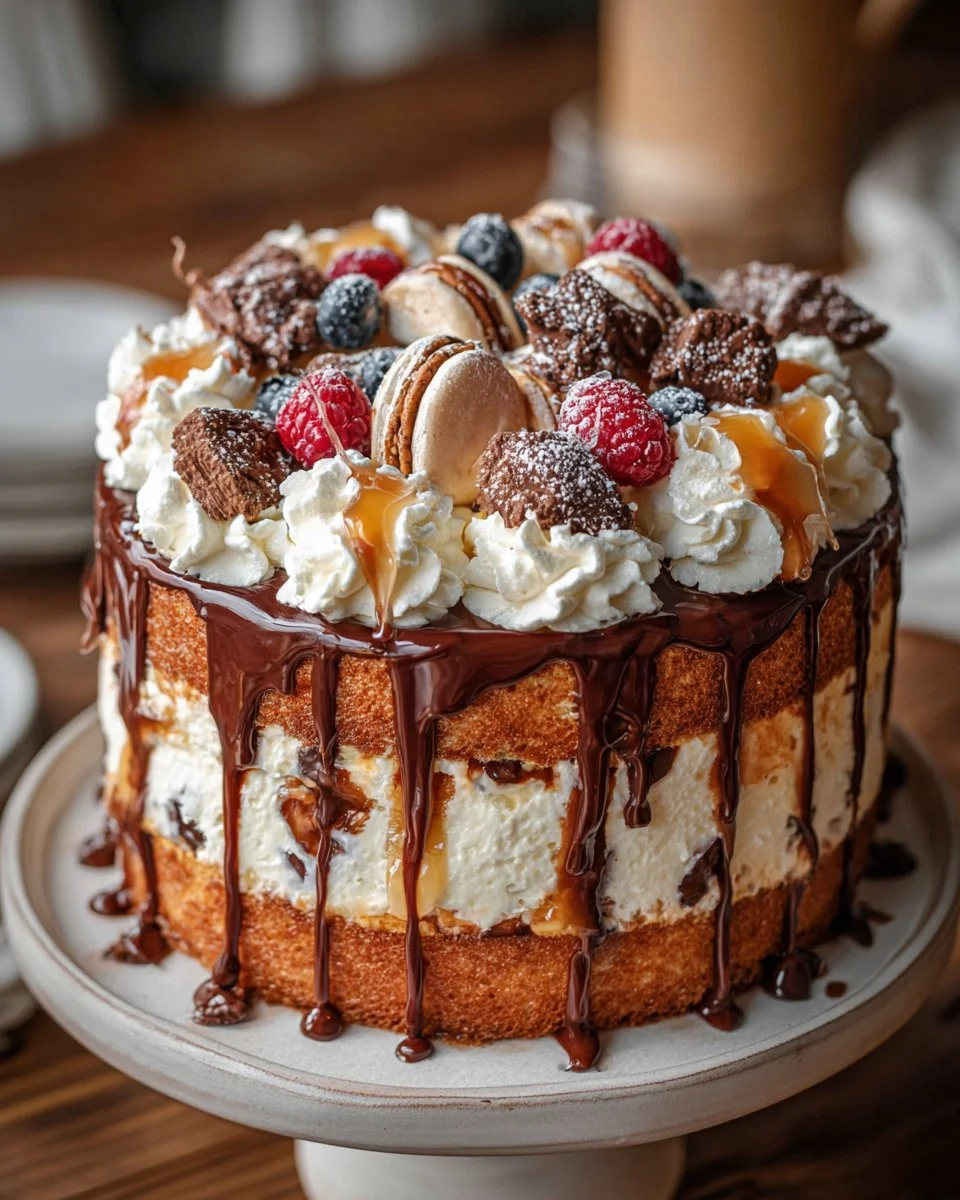
What makes the Heaven on Earth Cake truly special? For me, it’s the layering process. The assembly is a pure act of joy! You begin with those fluffy angel food cake cubes—it’s like they’re whispering, "Layer me, layer me!" Then, introducing those vibrant mixed berries adds a burst of color and freshness, making each bite as visually pleasing as it is flavorful. And let’s not forget about that luscious pudding mixture! The blend of vanilla and sour cream gives it a richness that is just plain addictive.
You can totally personalize this dessert. Use berries from your garden, or swap in seasonal fruits, creating a different taste experience every time. And if you’re feeling adventurous, a good drizzle of caramel or berry sauce (or both—who am I to judge?) takes it up a notch.
Now, let’s get to the important stuff—the ingredients!
Ingredients
- 1 prepared angel food cake (store-bought or homemade), cut into cubes
- 2 cups mixed berries (strawberries, blueberries, raspberries)
- 1 can (21 oz) pie filling or fruit topping (I love using cherry or strawberry)
- 1 box (3.4 oz) instant vanilla pudding mix
- 1½ cups cold milk
- 1 cup sour cream
- 2 cups whipped topping (Cool Whip or homemade)
- Caramel or berry sauce for drizzle
- Extra berries and whipped cream swirls for garnish
Let’s break it down:
-
Angel Food Cake: This cake is divine—not just for its light, airy texture but also because it absorbs flavors beautifully. If you’ve never made your own, don’t stress. A store-bought version is perfectly fine and saves lots of time.
-
Mixed Berries: You can use whatever you have on hand, honestly. Fresh or even frozen (thawed, of course) work like a charm. I often mix strawberries with blueberries and raspberries, and the colors pop like a summer sunset!
-
Pie Filling: Okay, this step is optional, but it adds an extra oomph! If you want to add layers of flavor, a pie filling like cherry or strawberry works phenomenally; it’s an added surprise in each layer.
-
Instant Vanilla Pudding Mix: Here’s where it all gets creamy and dreamy! The instant kind is a game-changer because there’s no cooking involved. Just whisk with cold milk, and you’re good to go.
-
Sour Cream: This might sound odd, but it contributes to the richness of the pudding. Do not skip it! It adds a creamy tang that balances the sweetness perfectly.
-
Whipped Topping: Whether you use a store-bought option or whip up your own, it’s the finishing touch. I mean, whipped cream is the crowning glory of desserts, right?
-
Drizzle: Your cake deserves a finishing touch! I suggest caramel for a sweet finish or berry sauce for something refreshing and tart.
Now, let’s dive into making this celebratory cake!
How to Make It Step-by-Step
Alright, folks, it’s time to get our hands a bit messy (in a good way)!
Step 1: Pudding Magic
First off, grab a medium mixing bowl and whisk together the instant vanilla pudding mix with the cold milk. Honestly, it’s like magic, watching it transform into a thick, luscious mixture. It starts out runny, and within mere minutes, it thickens to a lovely custardy consistency. The smell? It’s pure bliss! Like a warm hug from grandma.
Now, here’s where we add the sour cream. Use a spatula to fold it into the pudding—some gentle movements will do the trick. Make sure it’s smooth and creamy; you don’t want any lumps in your delicious pudding mixture. You’ll be tempted to eat it straight away, but let’s refrain… for now!
Step 2: Layering Fun
Time to grab that trifle dish or large glass bowl! Place half of the angel food cake cubes at the bottom. I like to take my time here, ensuring all cubes are nestled together. The texture is just sooo delightful; I could squish it in my hands all day long!
Next, sprinkle half of your mixed berries over the cake. The colors are vibrant and inviting, hinting at the deliciousness to come. If you’ve chosen to use pie filling, ladle that over the berries—what a lovely surprise waiting to be discovered!
Now for the best part: spread half of that creamy pudding mixture over the berries. I recommend using an offset spatula for easy spreading. As you layer, the scent wafts up; it’s sweet, thick, and creamy—total bliss!
Step 3: The Repeat
Repeat the layers: another layer of cake cubes, berries, and lastly, that heavenly pudding mixture. Seriously, you’re almost there!
Step 4: The Whipped Topping Finale
To finish—because we’re going all out here—it’s time for the whipped topping! A lavish spread over the final layer is what we’re aiming for. You can be as decorative or as messy as you’d like—this isn’t a fancy Italian restaurant; it’s your kitchen!
Now, grab that caramel or berry sauce, and drizzle it over the top. Use a spoon or squeeze bottle to create those beautiful squiggles! Finally, garnish with a few extra berries and some whimsical swirls of whipped cream. Your masterpiece is complete!
Step 5: Cool & Set
Now, pop that beauty in the fridge for at least two hours. This step is crucial, as it allows the flavors to blend beautifully and the texture to set. Just remember it’s there! Trust me, the anticipation is part of the fun.
Now onto my usual mistake: while waiting, do not, I repeat, DO NOT forget it and accidentally serve dinner first! Yep, I’ve done that. Dessert should always come last, but let’s keep it real; we all have those moments!
Tips for Best Results
Here are a few tips I wish I had when I first made this cake:
-
Use cold ingredients: This means starting with chilled milk and sour cream. It helps the pudding set more diligently!
-
Don’t rush the layers: Take your time building those layers; you want each ingredient to shine and be well represented. Everyone deserves a fair share of berries!
-
Prep ahead: Assemble your cake a day in advance for maximum flavor mingling.
-
Serve chilled: Not only does it taste better (hello, refreshment!), but it makes for easier slicing too!
Ingredient Substitutions & Variations
Feel free to get creative! Swap in different fruits depending on the season. Peaches, kiwi, or even bananas work splendidly. You could also try flavoring the vanilla pudding mix with almond extract for a nutty twist, or switch to chocolate pudding for a decadent take.
-
Dairy-Free Alternatives: Use non-dairy whipped topping and almond or oat milk for the pudding for a vegan version.
-
Keto-Friendly: If you’re following a keto meal plan, look for sugar-free pudding mixes and a low-carb angel food cake recipe.
-
Chocolate Lovers Unite: For a chocolate version, try a chocolate cake instead of angel food and chocolate pudding mix. Stack it high with berries!
Directions
- In a bowl, whisk together instant vanilla pudding mix and cold milk until thick.
- Stir in sour cream until smooth and creamy.
- In a trifle dish or large glass bowl, layer half of the angel food cake cubes, half the mixed berries, and half the pudding mixture.
- Repeat the layers.
- Spread whipped topping over the final layer and drizzle with caramel or berry sauce on top.
- Garnish with fresh berries and extra whipped cream swirls.
- Refrigerate for at least 2 hours before serving to allow the flavors to blend beautifully.
Pairing Ideas (Drinks, Sides, etc.)
What to enjoy with your cake? Honestly, a cool glass of sweet tea or fruity soda pairs effortlessly. In winter, opt for a spiced apple cider; it’s like a cozy blanket in a cup! And hey, if you’re feeling indulgent, serve alongside a hot chocolate topped with whipped cream for that extra luxurious touch. This and a rom-com? Perfection!
How to Store and Reheat Leftovers
Leftovers? They won’t last long, but in case they do, simply keep the cake covered in the fridge. It is best enjoyed chilled, so there’s no need to reheat. Just spoon it out and enjoy! However, I wouldn’t recommend freezing this dessert as the texture will change once thawed.
Make-Ahead and Freezer Tips
As a make-ahead dessert, you can definitely assemble the Heaven on Earth Cake a day in advance! Just keep it refrigerated to allow those beautiful flavors to meld. And if you MUST freeze, suggest letting it thaw overnight in the fridge before serving, but I’d rather recommend gobbling it all fresh!
Common Mistakes to Avoid
-
Rushing the cooling time: I’ve been there! Patience is key. Letting it chill allows all the flavors to marry beautifully.
-
Using warm ingredients: The pudding won’t set properly, leading to a soggier layer rather than that delightful creamy fluff.
-
Over-layering: Keep it balanced. Too much of anything leads to a kitchen battle—no one wins and everyone ends up covered in pudding!
Frequently Asked Questions (FAQ)
Q: Can I use a different cake base?
A: Absolutely! While traditional angel food cake works best for texture, feel free to use sponge cake or pound cake, especially if you prefer a sturdier base.
Q: How long can I store leftovers?
A: If you happen to have any (which is rare!), leftovers stay good in the fridge for about 3-4 days.
Q: Can I make it gluten-free?
A: Yes! Just use a gluten-free angel food cake mix and make sure your pudding mix is gluten-free as well.
Q: How can I make it lower in sugar?
A: Use sugar-free pudding mix and a low-sugar whipped topping. It’ll still be delicious!
Cooking Tools You’ll Need
- Mixing bowl
- Whisk
- Spatula
- Trifle dish or large glass bowl
- Squeeze bottle (optional for sauces)
Final Thoughts
The Heaven on Earth Cake is more than just a dessert; it’s a delightful reminder of the simple pleasures of cooking. It’s a sweet honor to share this recipe with you, and I hope it brings as much joy to your kitchen as it has to mine. Embrace the chaos, the mess, and the love you put into it.
If you enjoyed this recipe, don’t forget to save it on Pinterest or share it with a friend! Let’s keep the love for sweet no-bake creations alive!
Heaven on Earth Cake
Ingredients
Cake Base
- 1 prepared angel food cake (store-bought or homemade), cut into cubes This cake is divine—not just for its light, airy texture but also because it absorbs flavors beautifully.
Filling
- 2 cups mixed berries (strawberries, blueberries, raspberries) You can use whatever you have on hand, fresh or frozen (thawed).
- 1 can (21 oz) pie filling or fruit topping (cherry or strawberry recommended) Optional but adds an extra layer of flavor.
- 1 box (3.4 oz) instant vanilla pudding mix Use instant for no cooking involved.
- 1.5 cups cold milk Use cold ingredients for best results.
- 1 cup sour cream Adds richness to the pudding.
- 2 cups whipped topping (Cool Whip or homemade) The finishing touch for the dessert.
Garnish and Optional Sauce
- Caramel or berry sauce for drizzle Adds a sweet finish.
- Extra berries and whipped cream swirls for garnish For decoration.
Instructions
Pudding Magic
- In a bowl, whisk together instant vanilla pudding mix and cold milk until thick.
- Stir in sour cream until smooth and creamy.
Layering Fun
- In a trifle dish or large glass bowl, layer half of the angel food cake cubes, half the mixed berries, and half the pudding mixture.
The Repeat
- Repeat the layers: another layer of cake cubes, berries, and pudding mixture.
The Whipped Topping Finale
- Spread whipped topping over the final layer and drizzle with caramel or berry sauce on top.
- Garnish with fresh berries and extra whipped cream swirls.
Cool & Set
- Refrigerate for at least 2 hours before serving to allow the flavors to blend beautifully.