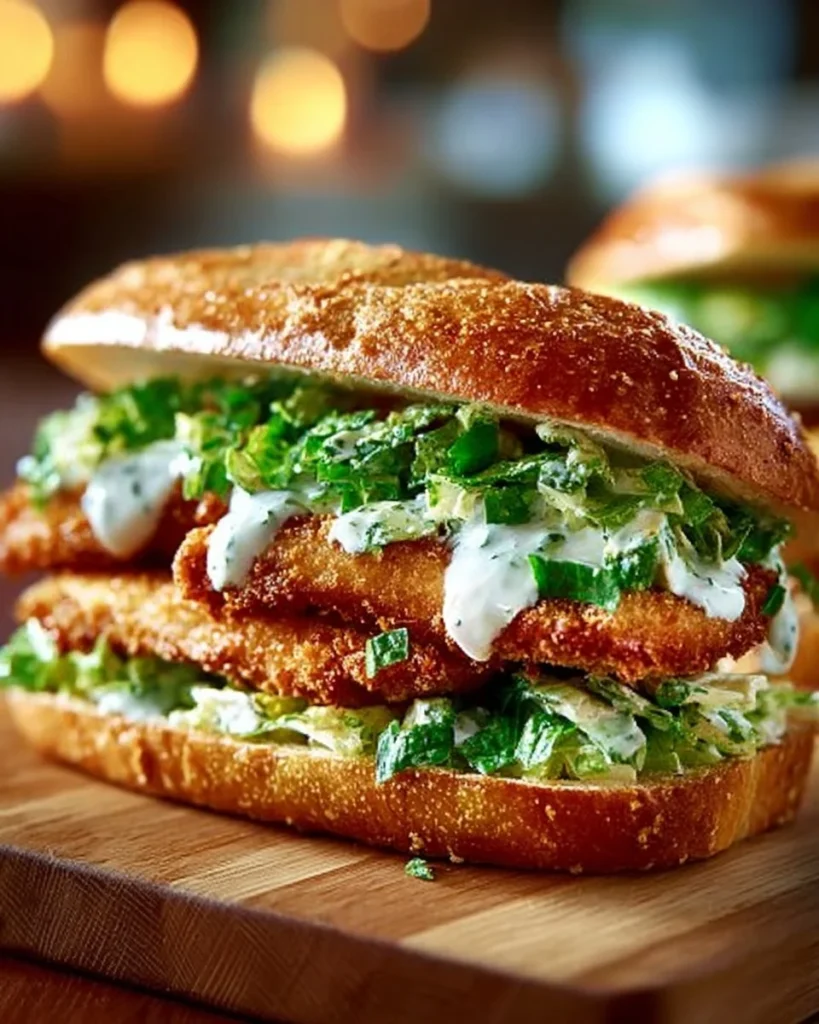

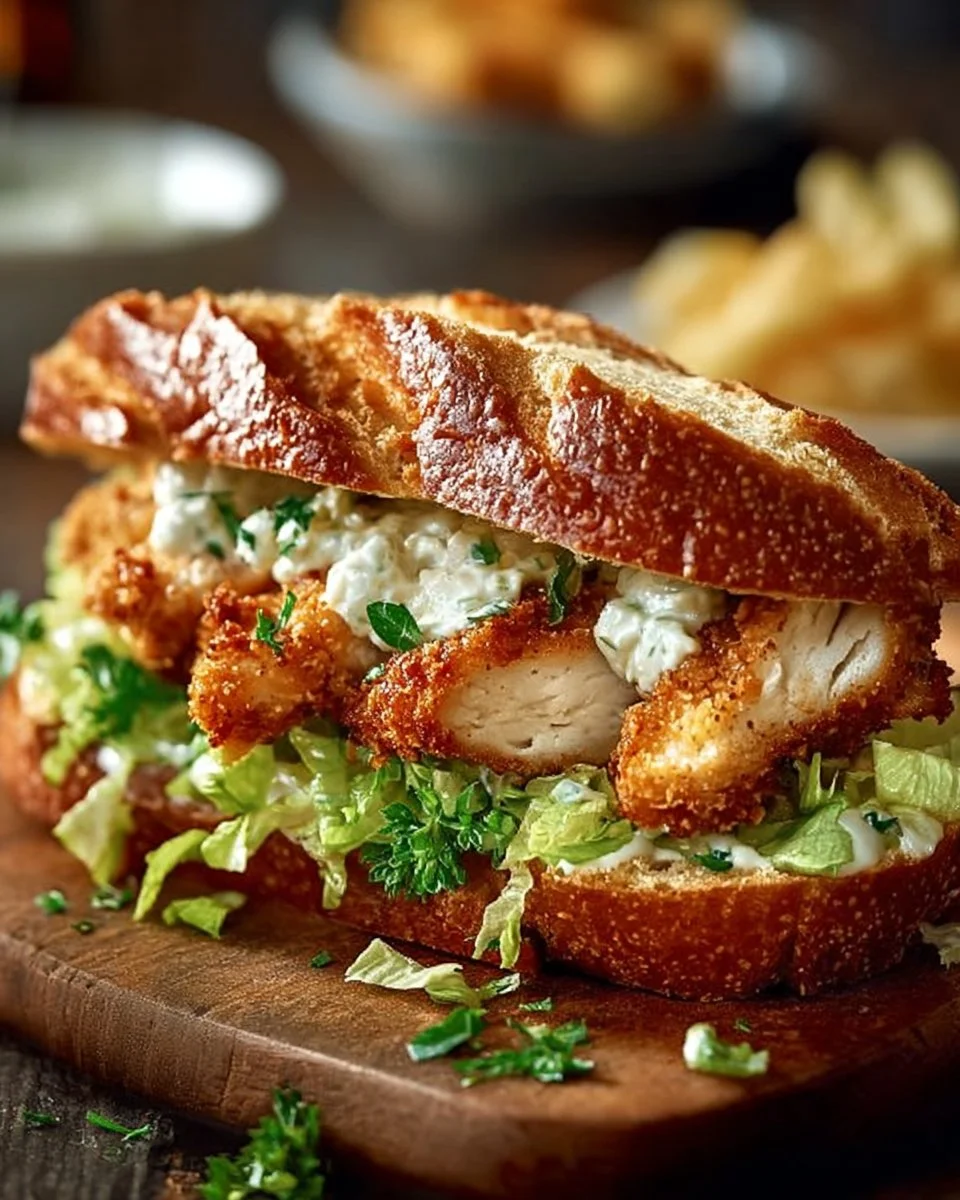
Crispy Chicken Caesar Sandwich: The Ultimate Recipe & Guide
I can’t quite pinpoint the moment when I fell in love with cooking, but I remember a particular summer evening. The sun was setting, casting a warm golden glow over the kitchen as I turned a simple weeknight dinner into something memorable. I was experimenting with a basic chicken sandwich, half-heartedly tossing condiments together when inspiration struck me like a lightning bolt (or maybe it was just the kids fighting over the last cookie in the corner). I had the idea—what if I combined my all-time favorite Caesar salad with crispy fried chicken? Boom!
Fast forward to today, and I find myself recreating that same magic, bringing you the Crispy Chicken Caesar Sandwich. Honestly, this recipe has become a staple in my household, especially when I’m looking for easy weeknight dinners that deliver big on flavor without sending me into a cooking frenzy. Family members coo over the crispy texture of the chicken, while the creamy, zesty dressing does its swaggering dance on my taste buds. It’s perfect for cozy nights or casual Friday gatherings.
So, if you’re ready to impress everyone with a slice of heaven between two brioche buns, sit tight! We’re going to roll up our sleeves, embrace the chaos of the kitchen, and whip up a sandwich that feels like a hug in a bowl (or, well, between buns)! Plus, it’s pretty chill for meal prepping—leftovers make for healthy comfort food that doesn’t taste like leftover sadness—perfect for the next day’s lunch or a lazy Sunday.
Why You’ll Love This Recipe
-
Ultimate Comfort: This sandwich is crispy, creamy, and oh-so-satisfying. It feels like indulgence, but it’s surprisingly easy to make.
-
Meal Prep Magic: More often than not, I make an extra batch of the chicken to use in salads or wraps throughout the week. It’s a solid addition to my high protein meals arsenal.
-
Crowd-Pleaser: My kids aren’t very adventurous with food, yet they gobble these sandwiches down without a fuss. Call me a kitchen magician!
-
Customizable: Whether you’re feeling traditional or want to jazz it up a bit—swap out the dressing, add pimentos or jalapeños, or pile in that leftover grated carrot—there’s room for creativity.
-
Gourmet Feel: Honestly, no one knows how accessible this recipe is. With the crispy chicken and homemade dressing, you’ll feel like a five-star chef!
-
Saves Bucks: This is a budget-friendly delight. Between the whole chicken breasts and the homemade dressing, you’ll save loads compared to what you’d pay for the same quality at a restaurant.
What Makes This Recipe Special?
There’s something about the crispy coating of the chicken that makes me feel like a rock star in the kitchen—the golden brown, the crunch, and then that satisfying “crunch” sound when you first sink your teeth into it. The high protein chicken melds beautifully with the creamy, tangy dressing, punctuated by the gratifying crunch of romaine. And let’s not forget the brioche buns—their sweetness plays perfectly with the savory chicken and zesty dressing, making each bite a delightful experience.
And speaking of experiences, I like to share a story about the first time I attempted to fry chicken. Picture this: me, a pan of hot oil, and some questionable chicken that turned into an absolute mess. How did I forget the splatter guard? I still giggle when I think back to chopping a fresh garlic clove, only to realize I hadn’t stored the oil properly—I ended up drifting through a kitchen fog of fried food that night. Thankfully, I learned my lesson and came out on the other side, armed with tips and tricks that keep the fun (and not the smoke) in my kitchen!
Ingredients
-
4 boneless, skinless chicken breasts (about 6 oz each): These will be the stars of your sandwich; choose chicken that’s fresh and not frozen, if possible.
-
1 cup buttermilk: This not only adds flavor but tenderizes the chicken, giving you that juicy texture we all crave.
-
1 tablespoon hot sauce: I swear by Frank’s RedHot. Just a splash adds that zing without overpowering the balance.
-
1 teaspoon salt and 1/2 teaspoon black pepper: Basic seasoning, but oh-so-important! It ensures the chicken tastes fantastic.
-
1 cup all-purpose flour and 1/2 cup cornstarch: This combo gives you optimum crunch. The cornstarch helps to make the crust extra crispy.
-
1 tablespoon garlic powder and 1 tablespoon onion powder: Essential for flavor, my friends! These seasonings elevate the frying flour from ordinary to extraordinary.
-
1 teaspoon paprika and 1/2 teaspoon cayenne pepper (optional): The paprika adds depth, while cayenne can give it a delightful kick. Feel free to adjust based on your heat preference!
-
Vegetable oil: Enough to fill your pan about an inch deep for frying. Always be cautious with hot oil and never leave it unattended!
-
1/2 cup mayonnaise: The creamy base for our dressing—it’s so good it might be a food-smuggling accomplice in a salad!
-
2 tablespoons grated Parmesan cheese: Because honestly, cheese—it makes everything better.
-
1 tablespoon lemon juice: A squeeze of lemon brings the dressing to life and rounds out the flavors.
-
1 teaspoon Dijon mustard: Adds a nice depth that complements the assertiveness of the parmesan well.
-
1 clove garlic, minced: Fresh garlic takes the dressing over the top! It also keeps vampires away, so win-win.
-
1/2 teaspoon Worcestershire sauce: Don’t skip this. It adds a lovely umami flavor that’s key to good Caesar dressing.
-
1/4 teaspoon black pepper: To taste.
-
2 tablespoons olive oil: This is the secret sauce to make the dressing emulsion smooth!
-
4 brioche buns, split: These bring a rich and buttery texture to the mix.
-
4 cups chopped romaine lettuce: Adds that fresh crunch.
-
1/2 cup shaved Parmesan cheese: Because why not? And optional: Tomato slices for garnish—bringing color and a little juiciness to our sandwich.
Remember, there’s no shame in experimenting! If you prefer a gluten-free option, you may substitute the flour and cornstarch with gluten-free flour blends.
How to Make It Step-by-Step
Let’s get cooking! I promise this will be fun…and probably a bit messy, so embrace it!
Step 1: Marinate the Chicken
Grab a medium bowl and whisk together the buttermilk, hot sauce, salt, and pepper. Honestly, this step deserves a simmering soundtrack—nothing too jazzy, maybe some classic rock to evoke childhood memories in the kitchen.
Add the chicken breasts to the mixture, giving them a good slosh so they’re fully submerged. Be sure to cover the bowl with plastic wrap and pop it in the fridge for at least 30 minutes. If you’re feeling extra ambitious, you can let it chill for up to 4 hours. Food tip: This not only makes the chicken flavorful but also incredibly tender and juicy.
Step 2: Prepare the Dredging Station
While the chicken is marinating, gather your dredging ingredients. In a shallow dish (think pie plate), whisk together the flour, cornstarch, garlic powder, onion powder, paprika, and optional cayenne pepper. Be sure to get everything blended well. Seriously, nobody wants a chunk of cayenne pepper as a surprise!
Step 3: Dredge the Chicken
Once the chicken has had its spa day, remove it from the marinade, allowing the excess to drip back into the bowl. Coat each chicken breast in the flour mixture, pressing gently to ensure a good adherence. Place them on a wire rack to set while you heat up the oil.
Step 4: Heat the Oil
In your large, heavy-bottomed skillet or Dutch oven, pour about 1 inch of vegetable oil. Crank the heat to medium-high and let it come to 350°F (175°C). How do you know when it’s ready? Place a small drop of the flour mixture into the oil; if it sizzles, you’re good to go!
Step 5: Fry the Chicken
Carefully lower the chicken breasts into the hot oil, ensuring not to overcrowd the pan—this is where my kitchen disasters often happen. Fry the chicken for about 6-8 minutes on each side. The moment you hear that glorious sizzle, well, to be real, it’s music to my ears!
Use a meat thermometer to check for doneness; it should reach an internal temperature of 165°F (74°C). Once cooked, remove the chicken and place it on a wire rack lined with paper towels to drain any excess oil.
Step 6: Combine Dressing Ingredients
While your chicken is cooling a bit, let’s whip up the dressings. In another medium bowl, whisk together the mayonnaise, Parmesan cheese, lemon juice, Dijon mustard, minced garlic, Worcestershire sauce, and black pepper.
Step 7: Emulsify the Dressing
With the dressing almost complete, slowly drizzle in the olive oil while whisking vigorously. This is probably the most therapeutic part of making the sandwich—just relax and let the oils meld together until you have a smooth, creamy coating that would win anyone over!
Give the dressing a taste and adjust seasonings based on what you prefer.
Step 8: Toast the Buns (Optional)
If you’re feeling fancy (I often do), lightly toast the brioche buns in a separate pan until they’re golden and buttery. This gives it an extra layer of flavor, plus it helps prevent the bread from getting soggy from the dressing.
Step 9: Assemble the Sandwich
Let’s build this beauty! Spread a generous amount of that heavenly Caesar dressing on the bottom half of each bun. Next, layer on a bed of chopped romaine lettuce, followed by a crispy chicken breast perched atop it. Douse it with more shaved Parmesan—because cheese doesn’t ruin anything—and if you’re feeling bold, lay on some juicy tomato slices.
Finally, place the top bun on your sandwich like a crown—the ultimate final touch!
Step 10: Serve Immediately
The aroma creaminess wafting from your kitchen is irresistible. Serve the Crispy Chicken Caesar Sandwich immediately while the chicken is still hot, crispy, and practically begging to be devoured!
Tips for Best Results
-
Fry in Batches: Especially if you’re cooking for a crowd, frying in batches helps maintain the oil temperature, ensuring you get that glorious crunch.
-
Don’t Rush the Marinade: Seriously, let it sit. The longer it marinates, the more flavors and tenderness you’ll get.
-
Adjust the Heat: Love heat? Don’t hesitate to amp up the cayenne! Not a fan? Leave it out or add a touch of honey for a twist instead.
-
Use a Meat Thermometer: This is an absolute must for perfectly cooked chicken every time.
-
Make Extra Dressing: You’ll definitely want some extra for salads later in the week!
Ingredient Substitutions & Variations
-
Gluten-Free: Use certified gluten-free flour blends or almond flour for dredging.
-
Keto or Low-Carb: Swap the brioche for lettuce wraps or keto-friendly buns.
-
Nut Allergies: Check the flour used and ensure all your condiments are nut free.
-
Extra Flavor: Try adding some fresh herbs like basil or dill into the dressing, or sriracha for a spicy twist.
Directions
- Marinate the chicken in buttermilk, hot sauce, salt, and pepper for 30 minutes to 4 hours.
- In a shallow dish, mix flour, cornstarch, garlic and onion powders, paprika, and cayenne.
- Dredge chicken in the flour mixture, letting excess fall off.
- Heat oil in a skillet to 350°F (175°C).
- Fry chicken for 6-8 minutes per side until golden brown and cooked through.
- For dressing, whisk mayonnaise, Parmesan, lemon juice, Dijon, garlic, Worcestershire, and pepper. Slowly drizzle in olive oil, whisking until smooth.
- Toast the buns (optional).
- Assemble sandwiches with dressing on bottom bun, romaine, crispy chicken, shaved Parmesan, tomato if using, and top bun.
- Serve immediately and enjoy!
Pairing Ideas: Serve with crispy sweet potato fries or a fresh arugula salad. Pair with your favorite beverage for a completely satisfying meal! A nice sparkling lemonade or iced tea would complement the sandwich beautifully.
How to Store and Reheat Leftovers
Leftovers can usually be a mixed blessing, but trust me, this sandwich stays delicious and doesn’t lose its charm. Place any leftover chicken and dressing in separate airtight containers in the fridge. When reheating, try to avoid microwaving; you might just dry out that gorgeous fried chicken! Instead, a quick stint in the oven at 350°F (175°C) will keep it crisp.
Make-Ahead and Freezer Tips
The chicken can be marinated and left in the fridge for up to 24 hours if you need a prep-ahead meal. I’ve also had success freezing the fried chicken once cooled, letting it thaw in the fridge overnight before reheating in the oven.
Common Mistakes to Avoid
-
Skipping the Marinate: Don’t do it! This will impact flavor and juiciness.
-
Overcrowding the Pan: This causes the oil temperature to drop, resulting in soggy chicken instead of crispy perfection.
-
Not Temping the Chicken: Ensure it’s fully cooked!
Frequently Asked Questions (FAQ)
Can I bake the chicken instead of frying it?
Yes! For a healthier alternative, you can bake the chicken at 400°F (200°C) for about 25-30 minutes, flipping halfway.
What if I don’t have buttermilk?
No problem! You can easily make a substitute by mixing 1 cup of milk with 1 tablespoon of lemon juice or vinegar and letting it sit for about 5-10 minutes.
Is the dressing good for salads?
Absolutely! This dressing pairs wonderfully with a fresh green salad or as a dip for veggies.
Can I prepare the dressing in advance?
Yes! You can prepare the dressing a few days ahead. Just store it in an airtight container in the fridge.
Can leftover chicken be used in other dishes?
Definitely! Shred or slice the leftover chicken for salads, wraps, or even pasta dishes.
Cooking Tools You’ll Need
- Heavy-bottomed skillet or Dutch oven
- Meat thermometer
- Whisk and mixing bowls
- Wire rack for draining oil
- Shallow dishes for dredging station
- Airtight containers for leftovers
Final Thoughts
This Crispy Chicken Caesar Sandwich holds a special place in my heart—its flavors remind me of home, family, and a bit of kitchen chaos that I’ve come to cherish. Cooking shouldn’t always be perfect; sometimes, it’s about the joy and memories that you create along the way.
Don’t forget—I’d love to hear about your own versions or kitchen adventures with this recipe! If you enjoyed this delightful culinary journey, please save it on Pinterest or share it with a friend! Happy cooking, friends!

Crispy Chicken Caesar Sandwich
Ingredients
For the Fried Chicken
- 4 pieces boneless, skinless chicken breasts (about 6 oz each) Choose chicken that’s fresh and not frozen.
- 1 cup buttermilk Adds flavor and tenderizes the chicken.
- 1 tablespoon hot sauce Use Frank’s RedHot for a nice zing.
- 1 teaspoon salt Basic seasoning.
- 0.5 teaspoon black pepper Basic seasoning.
- 1 cup all-purpose flour Used for dredging.
- 0.5 cup cornstarch Helps make the crust extra crispy.
- 1 tablespoon garlic powder Essential for flavor.
- 1 tablespoon onion powder Essential for flavor.
- 1 teaspoon paprika Adds depth.
- 0.5 teaspoon cayenne pepper Optional, adds heat.
- 1 inch vegetable oil For frying, enough to fill the pan about an inch deep.
For the Dressing
- 0.5 cup mayonnaise The creamy base for the dressing.
- 2 tablespoons grated Parmesan cheese Enhances flavor.
- 1 tablespoon lemon juice Brightens flavors.
- 1 teaspoon Dijon mustard Adds depth.
- 1 clove garlic, minced Fresh garlic adds a punch of flavor.
- 0.5 teaspoon Worcestershire sauce Adds umami flavor.
- 0.25 teaspoon black pepper To taste.
- 2 tablespoons olive oil For emulsifying the dressing.
For the Sandwich
- 4 pieces brioche buns, split Adds rich texture.
- 4 cups chopped romaine lettuce Adds fresh crunch.
- 0.5 cup shaved Parmesan cheese For topping.
- optional Tomato slices for garnish Brings color and juiciness.
Instructions
Preparation
- Marinate the chicken in buttermilk, hot sauce, salt, and pepper for at least 30 minutes to 4 hours.
- In a shallow dish, mix flour, cornstarch, garlic powder, onion powder, paprika, and optional cayenne.
- Dredge chicken in the flour mixture, letting excess fall off.
- Heat oil in a skillet to 350°F (175°C).
- Fry chicken for 6-8 minutes per side until golden brown and cooked through.
- For dressing, whisk mayonnaise, Parmesan, lemon juice, Dijon, garlic, Worcestershire, and pepper. Slowly drizzle in olive oil, whisking until smooth.
- If desired, toast the buns until golden and buttery.
- Assemble sandwiches with a spread of dressing on the bottom bun, romaine, crispy chicken, shaved Parmesan, and top with the bun.
Serving
- Serve immediately, enjoying while the sandwich is hot and crispy.