
Easy Earthquake Cake That Will Delight Your Family
Ah, Earthquake Cake. Just saying the name makes me want to throw on my apron and bake! My first experience with this decadent dessert was at my cousin’s house during a family gathering. Picture this: a bustling kitchen filled with laughter, the sweet scent of chocolate wafting through the air, and a slightly chaotic dessert table that looked almost like it had experienced a tiny earthquake itself. In the middle of all that deliciousness sat this majestic cake, its warm chocolate layers peeking through swirls of luscious cream cheese, coconut, and crunchy pecans.
When I first tried Earthquake Cake, I was captivated by its unique texture and flavor. It was like a hug from a grandma wrapped in chocolate. It felt special—not just because of the taste, but also because it reminded me of those time-honored family traditions where a simple recipe could spark joy and ignite memories. And trust me, considering my kitchen skills back then, this recipe was a total lifesaver. Between my tendency to burn toast and the infamous spaghetti explosion incident, I needed all the help I could get in the baking department!
This cake always brings me right back to those cozy evenings, with dimmed lights, family piled on the couch, and a rom-com playing in the background. Honestly, you can have the wildest chaos going on in your life, and one slice of this cake’s gooey, chocolatey goodness transforms everything into a serene bliss. It’s that delightful! Why? Well, let me spill the beans on why this recipe is a must-try.
Why You’ll Love This Recipe
- Super Easy to Make: With just a handful of ingredients, you can whip up a cake everyone will love.
- Comfort Food Vibes: The rich chocolate and creamy filling feel like wrapping yourself in a warm blanket.
- Perfect Leftovers: If there are any leftovers. Good luck with that! But if you manage to have some, it’s even better the next day.
- Picky-Eater Approved: I’ve never met anyone who can resist this cake—trust me on this one.
- Meal Prep Win: Not just a dessert; it can easily be transformed into a filling breakfast alongside a cup of coffee.
- Quick Family Dessert: One pan, minimal mess, and a beautiful presentation. What’s not to love?
This Earthquake Cake is truly special—not just because it’s delicious but also because it brings people together. I remember nights sunk into blissful couch cuddles with my loved ones, sharing stories and laughter, while the unmistakable aroma of this cake filled the air. It’s the little things, isn’t it?
What Makes This Recipe Special?
There’s something magical about the combination of chocolate cake and a sweet, tangy cream cheese filling that sets it apart from other desserts. It’s the sweet signature of home, something you’d expect to find at dinner parties or a neighbor’s surprise bake sale. The contrast of textures—the gooeyness of the cream cheese center against the softness of the chocolate cake—is like finding sweet treasure in every bite. You’re going to absolutely adore making—oops, and eating!—this cake.
Now let’s get to the fun part—making the cake!
Ingredients
- 1 box chocolate cake mix: I usually opt for the classic brand everyone knows (no secret here). It’s reliable and easy.
- 1 cup water: Hydration is key, even in baking!
- 1/2 cup vegetable oil: This keeps the cake moist and tender. You could also use melted coconut oil for a twist!
- 3 large eggs: Adds richness and structure, making the cake fluffy and delightful.
- 1 cup shredded coconut: For that chewy texture and added coconut flavor—honestly, don’t skip this!
- 1 cup chopped pecans: They add a lovely crunch and taste that complements the chocolate like a best friend.
- 1 (8 oz) package cream cheese, softened: This is the star of the show! Creamy and rich, it makes the cake feel indulgent.
- 1/2 cup sugar: A little bit of sweetness to balance the richness of the cream cheese.
Don’t do this: Whatever you do, don’t forget to soften the cream cheese before trying to mix it with sugar. I learned that the hard way. There’s nothing worse than a clumpy filling!
How to Make It Step-by-Step
Alright, folks, let’s roll up our sleeves and get started on our Earthquake Cake. If you follow along, I promise it’ll be worth the chaos we might create!
Step 1: Preheat and Prepare
First things first—preheat your oven to 350°F (175°C). While it’s warming up, grease a 9×13 inch baking pan. Pro tip: use some parchment paper for extra insurance against sticking. Trust me; you do NOT want a cake-splosion because you forgot the greasing part!
Step 2: Mix the Cake Batter
In a large mixing bowl, throw in the box of chocolate cake mix, water, vegetable oil, and eggs. No need to overthink it—just mix until it’s all well combined. Honestly, I like to use a whisk; it feels like I’m giving the cake mix a good workout.
Step 3: Add Half the Batter to the Pan
Now, pour about half of that luscious batter into your prepared pan. Gently spread it out but don’t stress about it looking perfect—it will all swirl together at the end.
Step 4: Create the Cream Cheese Layer
In a separate bowl, mix that softened cream cheese with sugar until it’s smooth and creamy. You want it to be a dreamy blend—not too thick but not runny either. If you accidentally left your cream cheese too long in the fridge, well, oops! This is where I often find myself using a cheeky microwave trick for 10 seconds to bring it back.
Spoon this delightful cream cheese mixture over the batter. I like to let it sink into the cake slightly; it adds to that wonderful surprise factor when you slice into it later.
Step 5: Top with Coconut and Pecans
Now, sprinkle the shredded coconut and chopped pecans evenly over the cream cheese layer. I usually go a little heavy on the coconut because, well, I just can’t get enough of that chewy goodness.
Step 6: Pour in the Remaining Batter
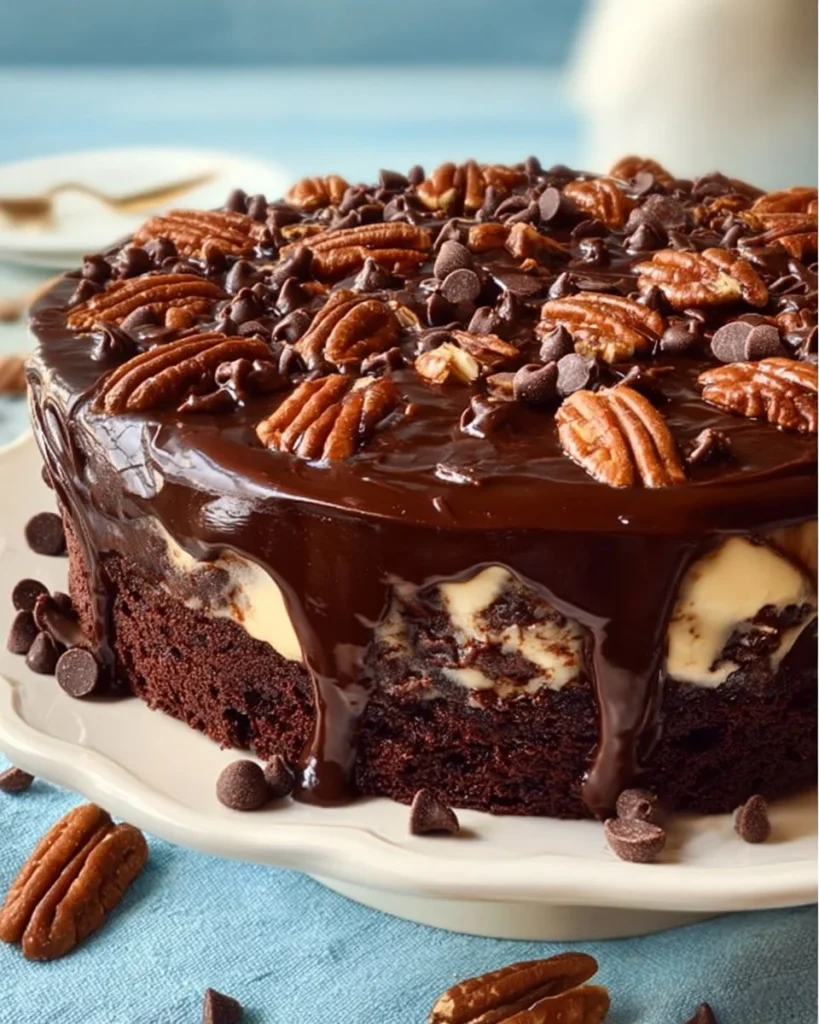
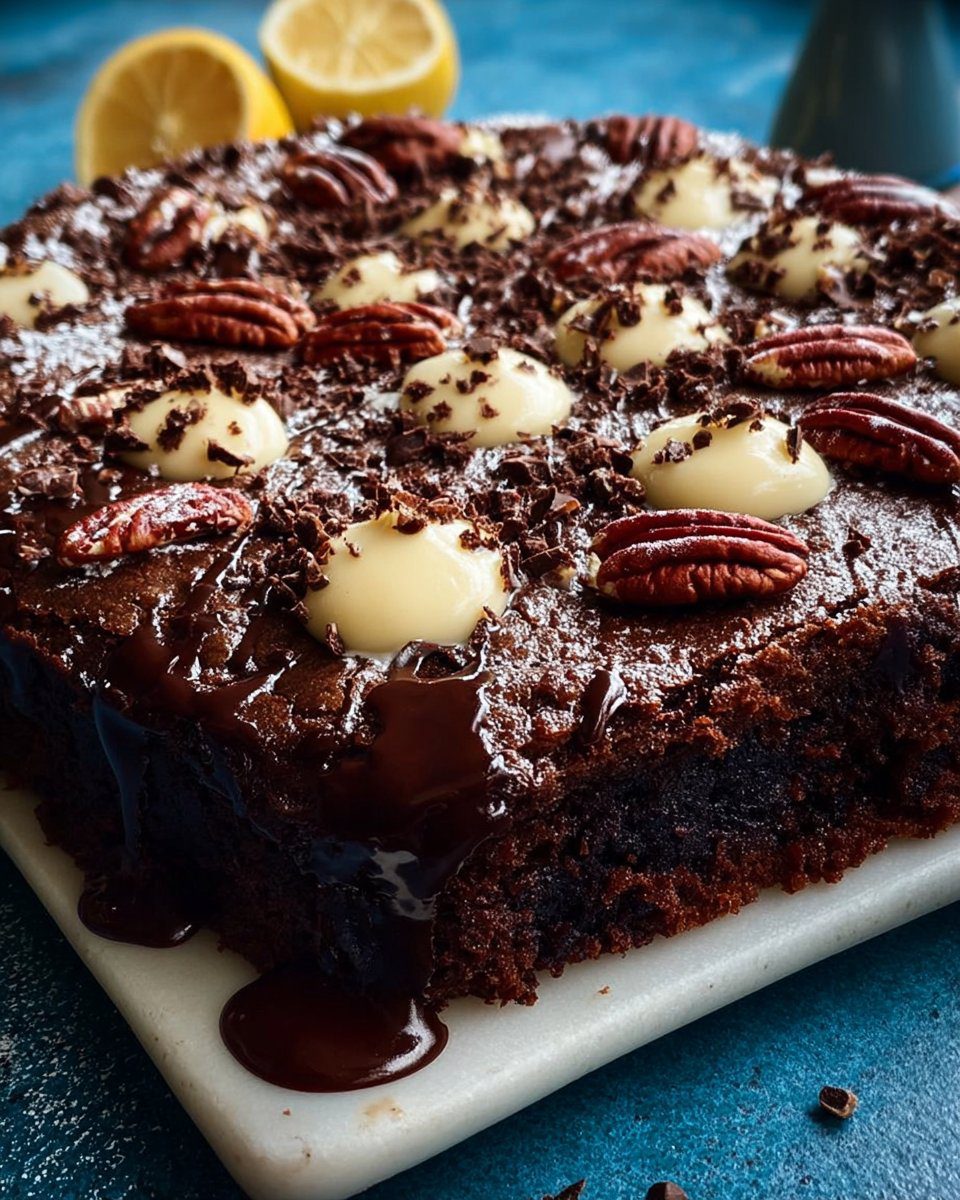
Pour the remaining cake batter over the filling. This part is always a little like playing Jenga—everything is a bit precarious! Then gently swirl the cream cheese mixture with a knife. This creates those beautiful ‘earthquake’ marks that make the cake so visually appealing.
Step 7: Bake!
Pop that beauty into your preheated oven and bake for 30-35 minutes. The aroma should start filling your kitchen around the 20-minute mark (it’s heavenly, I promise!). You’ll know it’s done when a toothpick comes out clean—or always a little fudgy if you catch my drift!
Step 8: Cool and Serve
Let the cake cool in the pan before you dig in! Patience is a virtue, even if your sweet tooth is clamoring. Feel free to serve it warm or at room temperature; it’s delicious either way.
Every time I take a bite, it feels like a celebration—a little moment of joy encapsulated in chocolate crust.
Tips for Best Results
- Use Fresh Ingredients: Fresher ingredients make for a more flavorful cake. Make sure your cream cheese and eggs are at room temperature, and your baking mix isn’t past its expiration date!
- Don’t Overbake: Keep a close eye as the baking time nears the end. The last thing you want is a dry cake—ugh.
- Add a Topping: If you want to get fancy, a sprinkle of powdered sugar or a dollop of whipped cream makes it feel even more special.
Ingredient Substitutions & Variations
Not a fan of pecans? Swap them out for walnuts or even some candy pieces to add a different layer of flavor. You can easily customize the coconut to your liking, or for a bit more zing, throw in some crushed pineapple for a tropical twist. As for the cream cheese? Try using flavored cream cheese (like vanilla) to add another layer of flavor!
Directions
- Preheat the oven to 350°F (175°C) and grease a 9×13 inch baking pan.
- In a large bowl, mix the chocolate cake mix, water, vegetable oil, and eggs until smooth.
- Pour half of the batter into the pan.
- In another bowl, combine softened cream cheese and sugar until smooth. Spoon it over the batter.
- Sprinkle with coconut and pecans.
- Pour the remaining batter over the filling and swirl the cream cheese with a knife.
- Bake for 30-35 minutes or until a toothpick comes clean.
- Let cool before serving.
Pairing Ideas (Drinks, Sides, etc.)
This cake is a beautiful standalone dessert, but if you want to take it to the next level, pair it with a rich cup of coffee or a scoop of vanilla ice cream—it’s pure magic. For a light touch, a cup of herbal tea would complement it perfectly. And hey, don’t forget to grab a good movie!
How to Store and Reheat Leftovers
If you have any leftovers (which is rare, let me tell you!), store them in an airtight container in the fridge. It’ll keep well for about 3-4 days. When ready to devour again, I recommend popping it in the microwave for about 15-20 seconds for that delightful warm experience. Just be cautious of those bursting pecans—not everyone is a fan of screaming points when you bite into a semi-hot one!
Make-Ahead and Freezer Tips
Feel free to make this cake a day in advance! You can also freeze portions if you want to savor it later. Let slices cool completely before wrapping them tightly in plastic wrap and then in aluminum foil, so it’s double protected from freezer burn. Thaw it in the fridge overnight when you want to enjoy it again.
Common Mistakes to Avoid
- Skipping the Parchment: Seriously, don’t skip this part; it’s saved my sanity more times than I can count.
- Overmixing the Batter: Be gentle! Your cake will thank you with its fluffy texture.
- Not Letting It Cool: I get it; waiting is hard, but slicing into a hot cake will just end in a messy situation.
Frequently Asked Questions (FAQ)
Q: Can I use a different cake mix?
A: Absolutely! While chocolate is my go-to, try vanilla or red velvet for a fun twist.
Q: Is there a dairy-free version of this Earthquake Cake?
A: You could substitute the cream cheese with a dairy-free alternative and use a non-dairy milk in the cake mix.
Q: How long will this cake last?
A: Wrapped properly, it can last in the fridge for about 3-4 days, but trust me, it probably won’t make it that long!
Cooking Tools You’ll Need
- Mixing bowls
- Electric mixer or whisk
- Measuring cups and spoons
- Rubber spatula
- Baking pan (9×13 inch)
- Parchment paper (just trust me on this!)
Final Thoughts
Baking this Earthquake Cake isn’t just about the final product; it’s about the journey you take to get there. Whether you’re sharing it with family or simply indulging during a cozy night in, the memories created around this dessert are what truly matter. It’s a delightful blend of warmth, love, and a good sense of humor. So embrace the little kitchen hiccups along the way because, at the end of the day, it’s all about enjoying the process.
If you enjoyed this recipe, don’t forget to save it on Pinterest or share it with a friend! Let’s keep the love for food alive, one slice at a time.
Earthquake Cake
Ingredients
Cake Ingredients
- 1 box chocolate cake mix Use a classic brand for reliability.
- 1 cup water Hydration is key even in baking.
- 1/2 cup vegetable oil Can substitute with melted coconut oil.
- 3 large eggs Adds richness and structure.
Filling and Toppings
- 1 cup shredded coconut For chewy texture.
- 1 cup chopped pecans Adds crunch and flavor.
- 1 (8 oz) package cream cheese, softened The star of the show; makes the cake indulgent.
- 1/2 cup sugar Balances the richness of the cream cheese.
Instructions
Preparation
- Preheat the oven to 350°F (175°C) and grease a 9x13 inch baking pan.
- In a large bowl, mix the chocolate cake mix, water, vegetable oil, and eggs until well combined.
- Pour about half of the batter into the prepared pan.
- In another bowl, mix the softened cream cheese with sugar until smooth, then spoon it over the batter.
- Sprinkle the shredded coconut and chopped pecans evenly over the cream cheese layer.
- Pour the remaining batter over the filling and gently swirl the cream cheese mixture with a knife.
Baking
- Bake for 30-35 minutes or until a toothpick comes out clean.
Serving
- Let the cake cool in the pan before serving. Enjoy warm or at room temperature.