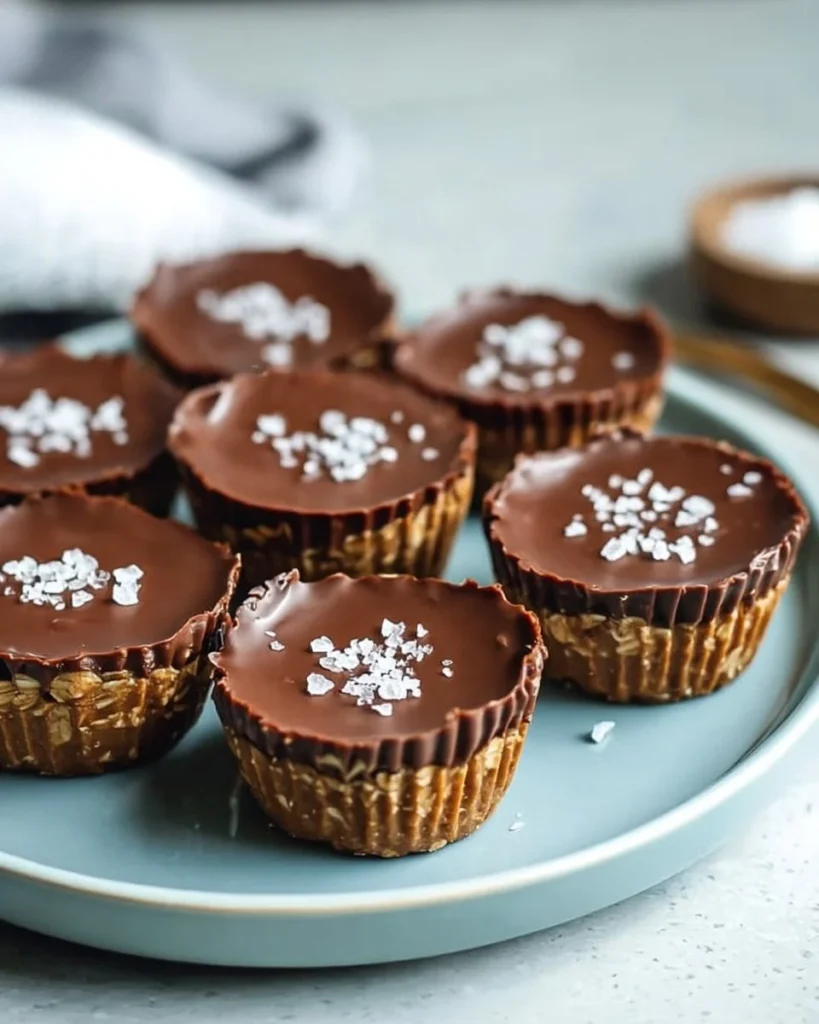

Easy No-Bake Peanut Butter Oat Cups: A Comforting Indulgence
When chaos hits my kitchen, as it often does, I find solace in the simplest recipes, and honestly, the No-Bake Peanut Butter Oat Cups have become my go-to. Let’s backtrack a bit. It was a rainy Saturday afternoon (you know the kind really—soft drizzles painting the windows with that dreamy kind of mood), and I was staring at a heap of peanut butter in the pantry, wondering how to utilize it without making a mess. Spoiler alert: I did make a mess, but that’s a story for later!
The beauty of these oat cups is not just in the delightful taste they deliver but in the nostalgia they evoke. One bite, and I’m transported back to childhood afternoons, snacking on peanut butter from a spoon while flipping through dog-eared storybooks. There’s something about the creamy goodness of peanut butter mixed with oats and a sprinkle of chocolate that feels like a warm hug on a chilly day. And let’s be real—I needed that comfort as I carefully balanced my smartphone on a precarious pile of baking supplies, trying to find the perfect Pinterest pin for reference.
So why does this recipe matter to me? Well, it’s not just about delicious, easy weeknight dinners or healthy comfort food. It’s about those cozy moments where you can whip something up in no time without needing ten different bowls or culinary diplomas. Besides, these cups are high in protein, making them perfect for my snack cravings while staying aligned with my budget-friendly meal plans.
Without further ado, let’s immerse ourselves in the world of convenience wrapped in peanut butter love!
Why You’ll Love This Recipe
-
Easy and Quick: You can whip these up in under 15 minutes—it’s truly almost too good to be true!
-
Healthy Comfort Food: Packed with wholesome oats and protein-rich peanut butter, they fill you up without a heavy feel.
-
Picky-Eater Approved: Honestly, I have yet to meet a kid (or adult, let’s be real) who could resist a treat that combines peanut butter and chocolate.
-
Perfect for Meal Prep: These cups are easily stored in the fridge, making them a great option for snacking throughout the week.
-
No Baking Required: Just mix, mold, chill, and voilà! You’re 15 minutes away from peanut butter paradise.
-
Homemade Goodness: No weird preservatives, just simple ingredients you probably already have at home. Trust me, your future self will thank you!
What Makes This Recipe Special?
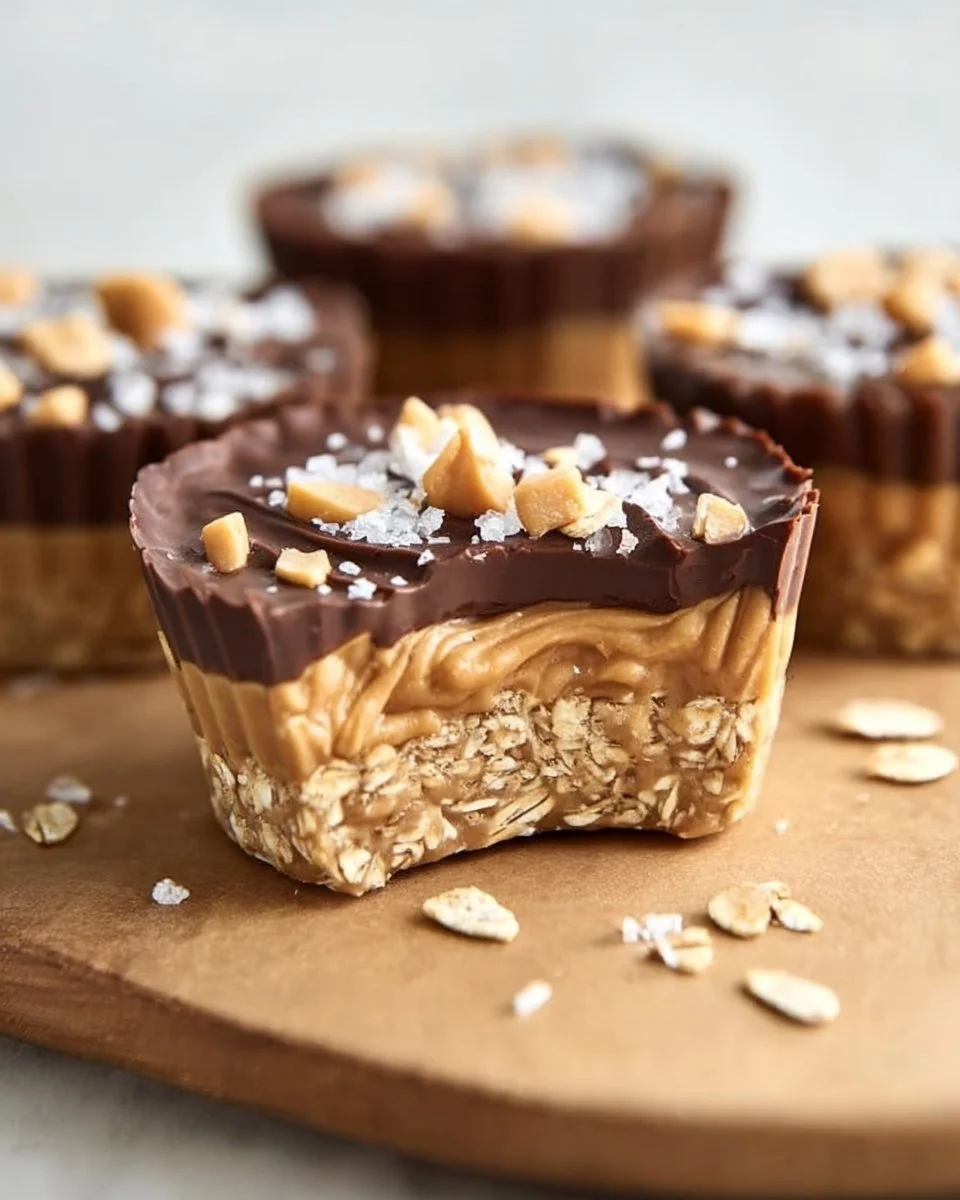
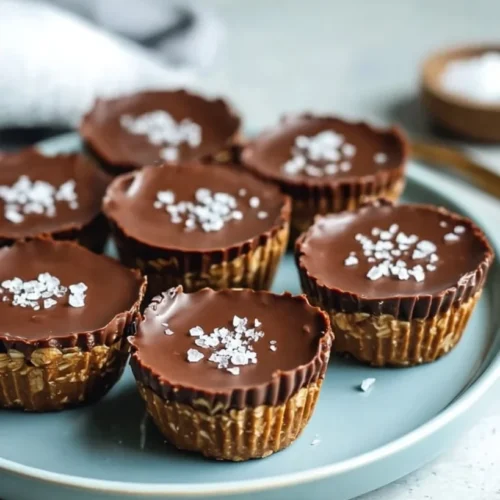
Now let’s dive into the good stuff—what truly makes these oat cups shine. The unique combination of flavors is the star here. Think about it: the nutty flavor of peanut butter, the chewy texture of oats, and the sweetness of honey or maple syrup, all topped with creamy, melty chocolate and a hint of flaky sea salt. It’s an explosion of taste that balances well between sweet and savory.
Each cup feels like a mini treasure, a moment of joy you can carry with you wherever life takes you. They remind me that a good snack should nurture not only your body but your soul too. Plus, on days when motivation to start dinner wanes (thanks, Netflix), I reach for these oat cups instead. They bring guilt-free happiness that feels like a warm memory wrapped up in a delicious, portable package.
Ingredients
1 cup peanut butter
Naturally, we start with the star of the show—peanut butter. Choose a natural variety without added sugar when possible. Pro tip: If you don’t like your snacks too sweet, opt for unsweetened peanut butter.
2 cups oats
Rolled oats are perfect for this recipe since they add the right amount of chewiness. I often use quick oats if I’m in a bind, but the texture of rolled oats is undeniably superior for this application. Trust me, it’s worth waiting those extra few minutes.
1/2 cup honey or maple syrup
You can’t go wrong with either of these sweeteners, but I lean toward maple syrup for a deeper flavor kick. Oops! Just be cautious with the amount—if you add too much, the cups can get too sticky.
1/2 cup chocolate chips
Because, let’s face it, life is too short to skip chocolate! I usually use dark chocolate for a slight bitterness that balances the sweetness, but feel free to choose your favorite. You could even throw in some nutty chunks or dried fruit for added flair—improvisation is always welcome here!
Flaky sea salt (for topping)
That sprinkle of flaky sea salt plays a crucial role! It cuts through the richness, bringing all the flavors together. Seriously, don’t skip this step—your tastebuds will throw a party.
How to Make It Step-by-Step
Step 1: Gather Your Gear
Alright, friends, let’s not pretend we have everything in order. I mean, I once started this recipe without even getting the mixing bowl out. So, gather your ingredients and tools like a grown-up! Ideally, you’ll need a large mixing bowl, a spatula, muffin tins (or silicone molds—because who has time for washing extra dishes?), and a microwave or double boiler for melting chocolate.
Step 2: Mix It Up
In an epic mixing bowl that I totally didn’t forget to find (yep), combine the peanut butter, oats, and honey or maple syrup. You may need to get a little messy with your hands here—trust me, it’s worth the sticky goodness. You want everything to be well-blended; stubborn clumps of oats are not invited to the party!
Step 3: Press, Don’t Stress
Now, let’s channel your inner artist and press the mixture firmly into the muffin tins or silicone molds. These will serve as the vessel for your soon-to-be epic oat cups! And let’s be real—smoother pressing can lead to prettier cups. I remember my first attempt when they came out lumpy and sad-looking. They still tasted good, but I could tell they were self-conscious about their appearances. Use a measuring cup or your hands to ensure they are firmly packed.
Step 4: Melting Magic
In a separate microwave-safe bowl (avoid my mistake of using a metal bowl; whoops!), melt your chocolate chips in 30-second intervals. This may feel like an eternity, but patience is key! Stir in between sessions, and take care not to scorch them. We want melted chocolate, not a science experiment gone wrong!
Step 5: Drizzle That Chocolate
Once your chocolate is all smooth and glossy, pour it generously over each oat cup. Feel free to channel your inner drizzling artist—mercury or a tongue-in-cheek Jackson Pollock, whatever works for you!
Step 6: Sprinkle With Love
Now, let’s take a moment for the flaky sea salt. Lightly sprinkle it over the chocolate before it sets. This is the moment that takes these oat cups from good to "oh my goodness; I need three more!"
Step 7: Chill and Set
Pop those beauties into the fridge for about 30 minutes. I’m not going to lie; this waiting game is brutal. You might be tempted to sneak a spoonful of dough (oops), but trust me—waiting will pay off. You want the chocolate to set properly.
Step 8: Enjoy the Fruits of Your Labor
Once the chilling time is up, gently pop the cups out of the molds. Feel free to give yourself a little round of applause. You deserve it! These cups should come out easily—if they don’t, maybe try using a little more coconut oil or cooking spray next time. I’ve definitely had my share of “the mold is winning” moments.
Tips for Best Results
-
Texture Matters: Make sure your mixture is not too dry; it should hold together when pressed. If it feels crumbly, add a bit more peanut butter or honey.
-
Get Creative: Don’t hesitate to throw in a handful of nuts or seeds for added texture. Chia seeds make for a lovely little crunch, and pumpkin seeds add festivity!
-
Temperature Control: If your peanut butter is too thick to combine smoothly with the oats, warm it up slightly—10-15 seconds in the microwave usually does the trick.
Ingredient Substitutions & Variations
-
Nut Butters: If peanut butter isn’t your jam, feel free to swap in almond butter or sunflower seed butter. These swaps can cater to allergies or just personal preference, and they work like a charm!
-
Sweetener Alternatives: If you’re feeling adventurous, consider using agave syrup or even a sugar substitute like monk fruit sweetener to tweak those macros. Adjust to taste!
-
Add-Ins: You can personalize these oat cups according to the season or occasion. During summer, toss in some dried cranberries or coconut flakes, and in fall, why not try a sprinkle of cinnamon?
Directions
1. In a mixing bowl, combine 1 cup peanut butter, 2 cups oats, and 1/2 cup honey or maple syrup until well mixed.
2. Press the mixture into muffin tins or silicone molds to form cups.
3. Melt 1/2 cup chocolate chips in a microwave or double boiler.
4. Pour the melted chocolate over the oat cups.
5. Sprinkle with flaky sea salt.
6. Refrigerate for about 30 minutes until set.
7. Pop out of the molds and enjoy!

Pairing Ideas (Drinks, Sides, etc.)
While I cherish these oat cups solo, they can also shine in a more elaborate spread. Pair them with a cup of your favorite herbal tea, or for those mornings when you really need a pick-me-up, enjoy them alongside a rich cup of coffee. They also pair nicely with a fruit smoothie for a balanced breakfast! Honestly, these oat cups and any classic rom-com are the ultimate duo—trust me, say goodbye to cringe-worthy snack moments.
How to Store and Reheat Leftovers
What leftovers? I kid, I kid! If you happen to have a few leftover cups, store them in an airtight container in the fridge. They can last about a week—though I doubt they’ll survive that long! Just remember not to stack them directly on top of one another unless you enjoy chocolate splatters.
Reheating isn’t necessary, but if you want that warm, melty chocolate experience, pop them in the microwave for about 10-15 seconds. Just don’t overdo it; we want moist heat, not molten lava!
Make-Ahead and Freezer Tips
One of the fabulous aspects of this recipe is its remarkable make-ahead capability! Prep these oat cups a few days in advance for quick snacks or breakfasts throughout the week. If you want to store them for longer, feel free to freeze them in an airtight container. They thaw beautifully overnight in the fridge, making them perfect for on-the-go situations.
Common Mistakes to Avoid
-
Overmixing: Yes, it sounds counterintuitive, but avoid overmixing the oat and peanut butter combo. It can create a dense mixture that won’t set as nicely. I’ve learned this the hard way—let’s just say some oat cups put up an impressive battle during my first attempt!
-
Chilling Time: Don’t skip the chilling step; it’s vital for the chocolate to set. I once impatiently dug in after 15 minutes, ending up with a messy chocolate explosion. Worth it? Maybe!
-
Toppings: Make sure to add toppings before the chocolate fully sets. Otherwise, guess who will be scraping melted salt off the chocolate?
Frequently Asked Questions (FAQ)
Q: Can I substitute the oats for something gluten-free?
Absolutely! Use certified gluten-free oats to keep it safe and delicious.
Q: What can I do with leftover ingredients?
Ugh, great question! If you have extra peanut butter or oats, consider making overnight oats or protein pancakes as an easy weeknight dinner.
Q: How many oat cups does this recipe yield?
You should get about 12 standard-sized cups, depending on your pressing technique—but don’t go complaining if you end up with a few extras!
Q: Can I add protein powder to this recipe?
Sure! This would make these cups an even more effective high-protein meal. Just reduce the oats slightly to maintain the texture.
Q: Do they need to be refrigerated?
While they can be stored at room temperature for a few hours, I highly recommend keeping them in the fridge for freshness.
Cooking Tools You’ll Need
- A large mixing bowl (don’t lose this like I do occasionally!)
- Measuring cups and spoons
- Muffin tins or silicone molds
- A microwave-safe bowl (useful for melting the chocolate)
- A spatula for mixing.
Final Thoughts
There you have it, my fellow kitchen enthusiasts! The No-Bake Peanut Butter Oat Cups are easy, delicious, and downright comforting, perfect for any snacking occasion. Whether you’re craving a midnight snack, a lunchbox treat, or just need an energy boost, these little cups are the answer to your culinary prayers!
If you loved this recipe, don’t forget to share it with a friend—it deserves a spot in every home! Don’t forget to save it on Pinterest too; I promise you’ll want to come back to these sweet delights in the future!
Peanut Butter Oat Cups
Ingredients
Main ingredients
- 1 cup peanut butter Choose a natural variety without added sugar.
- 2 cups rolled oats Rolled oats are preferred for chewiness.
- 1/2 cup honey or maple syrup Maple syrup gives a deeper flavor.
- 1/2 cup chocolate chips Use dark chocolate for a slight bitterness.
- flaky sea salt Lightly sprinkle on top before chocolate sets.
Instructions
Prepare Ingredients
- Gather your ingredients and tools like a mixing bowl, spatula, muffin tins or silicone molds, and a microwave for melting chocolate.
Mix Ingredients
- In a large mixing bowl, combine peanut butter, oats, and honey or maple syrup until well mixed.
Mold the Cups
- Press the mixture firmly into muffin tins or silicone molds.
Melt Chocolate
- Melt chocolate chips in a microwave-safe bowl, using 30-second intervals to avoid scorching.
Add Chocolate
- Pour melted chocolate over each oat cup.
Add Sea Salt
- Sprinkle flaky sea salt over the chocolate before it sets.
Chill
- Refrigerate for about 30 minutes until chocolate is set.
Serve
- Pop the cups out of the molds and enjoy!