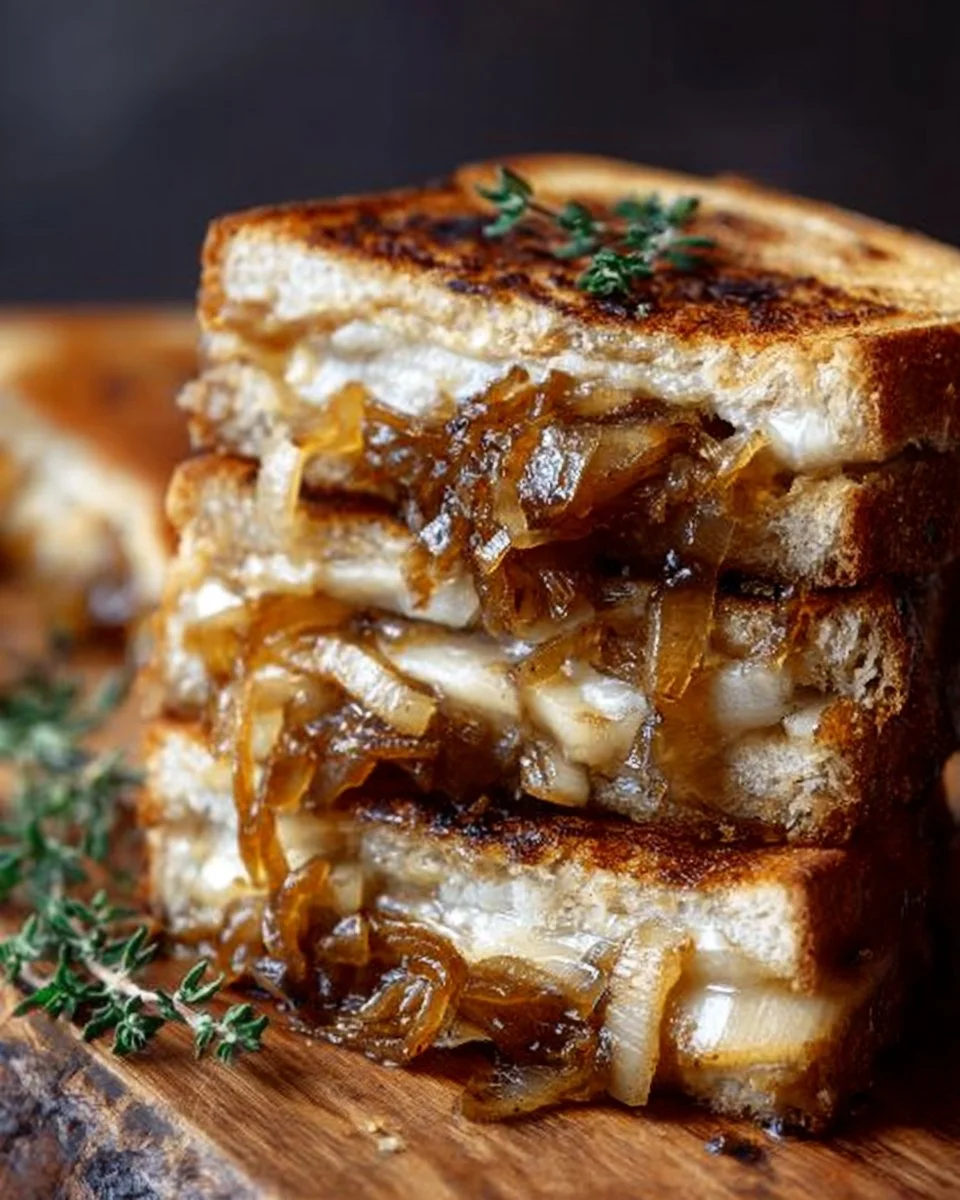
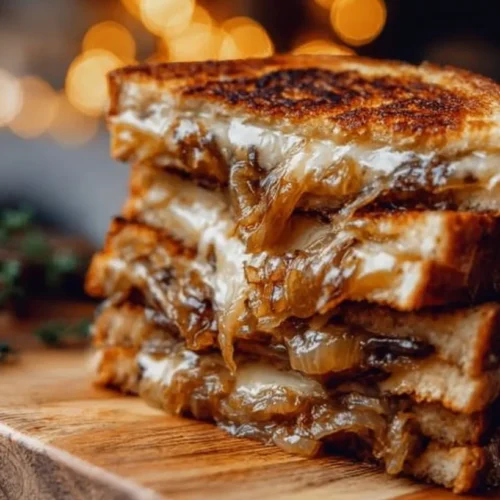
The Best Pear & Apple Grilled Cheese With Caramelized Onions
There’s something seriously comforting about grilled cheese sandwiches, isn’t there? They take you back to simpler times—perhaps your childhood or cozy evenings spent with loved ones. Today, I’m excited to share my version of this classic with a twist: Pear & Apple Grilled Cheese With Caramelized Onions. This recipe has become a beloved staple in my home, especially on cool nights when we just need a warm hug in food form.
Let me paint the picture for you: It was one of those chilly evenings where you could almost smell autumn creeping in. A cozy light flickered in my kitchen, casting warm shadows on the walls. I wanted something comforting, quick, and fulfilling—something that felt like home. After rummaging through my pantry, I discovered some beautifully ripe pears and apples. My heart raced a little; I knew the taste combination would elevate the usual grilled cheese into a masterpiece.
Of course, like any cooking adventure, there were a couple of "oops" moments. Who hasn’t burned the first batch of caramelized onions, or accidentally put garlic salt instead of regular salt? Yup, that happened. But my mishaps led to learning experiences, and now I’ve perfected this dish into one you’ll want to keep handy, especially when you’re in need of easy weeknight dinners or quick family meals.
What makes this sandwich unique isn’t just the delightful pairing of sweet apples and pears with tangy balsamic vinegar—it’s the deliciously gooey sharp cheddar that ties everything together. I assure you, every bite will have you saying, “Wow, I didn’t expect that!”
Why You’ll Love This Recipe
- Quick & Easy: Perfect for those nights when you just can’t deal with complicated cooking but want something special.
- Family-Friendly: This dish is sure to win over even the pickiest eaters in your household. Who can resist gooey cheese and sweet fruits?
- Leftover Bliss: If you happen to have leftovers (which is rare in my house), they reheat beautifully.
- Seasonal Flavors: The combination of pears and apples really plays well into fall or winter, making it feel like a warm, cozy hug.
- Nutritional Goodness: Packed with fruit and protein from the cheese, this recipe fits into healthy comfort food territory.
- Budget-Friendly: With ingredients you likely already have, this recipe is easy on both your wallet and your time.
What Makes This Recipe Special?
The delicate blend of sweet and savory, along with the buttery crunch of toasted sourdough, makes this dish stand out. Plus, there’s something undeniably special about caramelized onions. The slow cooking transforms them from sharp to sweet, giving a depth of flavor that you wouldn’t expect in your typical grilled cheese. Trust me; this isn’t just food; it’s an experience!
Another twist: traditionally, grilled cheese is drenched in melted cheddar. However, with the addition of apples and pears, you get delightful bursts of texture and sweetness that contrast beautifully with the cheese’s sharpness. So, I guess you could say this sandwich is a love story—one where salty meets sweet, and they live happily ever after.
Ingredients
- 4 slices sourdough bread: The hearty texture and flavor provide a perfect base for our combo.
- 2 tablespoons unsalted butter: Adds richness and ensures a golden, crispy exterior.
- 1 medium pear, thinly sliced: Sweet and juicy, pears add a delightful contrast to the cheese.
- 1 medium apple, thinly sliced: Tartness from the apple complements the pear and onions beautifully.
- 1 medium onion, thinly sliced: Those caramelized onions are the magic! They bring out sweetness and depth.
- 1 cup shredded sharp cheddar cheese: We need that melty goodness, and sharp cheddar’s bite creates a nice balance.
- 1 tablespoon balsamic vinegar: A splash of acidity enhances the overall flavor profile.
- Salt (to taste): Enhances all the flavors—don’t skip this!
- Black pepper (to taste): Adds a touch of warmth.
As always, I recommend using the freshest ingredients you can find.
You don’t want to open a package of sad, aging cheese, right? Opt for a good-quality cheddar; it really makes a difference! And a little gal or guy tip: If you’re gluten-free, you can definitely swap out the sourdough for your favorite gluten-free bread. Just be cautious about how it toasts; some gluten-free breads can burn a little quicker.
Don’t leave out the balsamic vinegar! Oops, I remember a time I did and ended up with a way less flavorful sandwich—learn from my mistakes!
How to Make It Step-by-Step
Alright, let’s get into the nitty-gritty of how to pull this delectable creation together. I promise it’s easier than it looks—and I’m right here with you through every step.
Step 1: Caramelize the Onions
To kick off this symphony of flavors, we start with our caramelized onions. Grab a skillet and melt 1 tablespoon of unsalted butter over medium heat. As it begins to foam, toss in those thinly sliced onions and add a pinch of salt. You might hear a soft sizzle—this is your cue to stir occasionally and breathe in that glorious aroma.
After about 10 minutes, you should see the onions starting to turn a beautiful golden color and soften beautifully. This is when you want to add 1 tablespoon of balsamic vinegar. Oh boy, the smell is overpowering in the best way. Cook for an additional 2-3 minutes until the vinegar has reduced slightly and everything is sticky and divine.
At this point, you’re probably wondering if it’s acceptable to just eat them straight from the pan. Honestly, I wouldn’t blame you! But patience, friend; we need these for our grilled cheese.
Step 2: Layer the Grilled Cheese
In the same skillet (because who wants an extra dish?), reduce the heat a touch and melt your remaining tablespoon of butter. You’ll want to coat the bottom of the skillet nicely for that perfect toast.
Now, assemble your sandwiches! On two slices of sourdough bread, layer half of your shredded sharp cheddar cheese. This will act as a solid base.
Next, distribute the caramelized onions evenly over the cheese—don’t skimp. After that, do the same with your apple slices (make sure they’re nice and thin!) followed by the pear slices. And just when you think it can’t get any better, top it all off with the rest of that glorious sharp cheddar cheese, then cover it with the other two slices of bread.
Step 3: Grill the Sandwiches
Now it’s time for the moment of truth: grilling! Place the assembled sandwich in the skillet. Hear that sizzle? Oh, it’s music to my ears! Grill on one side for about 4-5 minutes, checking for that lovely golden-brown color.
Once you feel like it’s looking good, carefully flip the sandwich over using a spatula. You might get an oozy bit of cheese trying to escape—honestly, those cheese pulls are what life is all about! Grill the other side for another 4-5 minutes, until the cheese has melted thoroughly and both sides are nicely toasted.
Repeat this for the second sandwich. When they’re both done, let them cool for a minute to slightly firm up before slicing in half. And oh boy, the gooey cheese is going to spill out a bit—just embrace it; it’s part of the magic!
Tips for Best Results
- Don’t rush the onions: The slower you let them cook, the sweeter they’ll get—not to mention the amazing aroma filling your kitchen.
- Use a high-quality cheddar: Trust me, it makes a HUGE difference in flavor.
- Don’t overload with ingredients: You want a balanced sandwich; too many toppings can make it hard to flip!
- Experiment with fruit: Pears and apples are a classic combo, but you could explore adding figs or your favorite stone fruit when in season.
- Stay close while grilling: Cheese can go from “golden brown” to “burned” in a flash, so keep an eye (and nose) out.
Ingredient Substitutions & Variations
Feeling adventurous? Here are a couple of fun ideas to customize or tweak this recipe:
- Swap the bread: Try a ciabatta or whole-grain bread for more texture and flavor.
- Different cheese options: Gouda, mozzarella, or even a blue cheese could take this flavor profile in a new direction.
- Herb it up: Fresh thyme or rosemary can be added to the onions for an aromatic touch.
- Add protein: Turkey slices or roasted chicken can turn this into a protein-packed meal. A great option if you’re working on a protein meal plan!
Directions
- In a skillet over medium heat, melt 1 tablespoon of unsalted butter.
- Add the thinly sliced onions and a pinch of salt. Cook, stirring occasionally, for about 10 minutes, until golden brown and softened.
- Stir in 1 tablespoon of balsamic vinegar and cook for an additional 2-3 minutes. Remove and set aside.
- In the same skillet, melt the remaining 1 tablespoon of butter over medium heat.
- Layer half of the shredded sharp cheddar cheese on two slices of sourdough bread.
- Add caramelized onions, then the apple slices, followed by the pear slices.
- Top with the remaining cheddar cheese and cover with the other two slices of bread.
- Grill one side for about 4-5 minutes until golden brown.
- Carefully flip the sandwich and grill the other side for another 4-5 minutes until the cheese is melted.
- Remove from the skillet, cool slightly, slice in half, and enjoy warm.
Pairing Ideas (Drinks, Sides, etc.)
As you dig into this delicious comfort food, why not take it a step further? Pair your grilled cheese with a warm bowl of tomato soup or a side salad drizzled with balsamic vinaigrette. Feeling extra cozy? A cup of hot apple cider or a smooth chardonnay can make your meal sing even sweeter—perfect for that Friday night in!
Picture this: it’s chilly outside, you’ve got your favorite rom-com on in the background, a warm bowl beside you, and this scrumptious sandwich. It’s simple, it’s comforting—perfection!
How to Store and Reheat Leftovers
If you manage to have any leftovers (which is like finding a unicorn), store your grilled cheese in an airtight container in the refrigerator. They’ll keep for 2-3 days. To reheat, I suggest using a skillet over low heat to maintain that crispy texture. Microwaving can make them soggy—no thank you!
Make-Ahead and Freezer Tips
Want to prep for the week? You can make the caramelized onions ahead of time and store them in the fridge for up to a week. When you’re ready to indulge, assemble your sandwiches right before grilling.
If you want to go the freezer route, assemble the sandwiches without grilling. Wrap them tightly in foil and freeze. When you’re ready to enjoy, you can grill them straight from the freezer; just add a few extra minutes to the cooking time.
Common Mistakes to Avoid
- Burning the onions: Keep an eye on them! Stick with a medium heat and stir consistently.
- Overstuffing the sandwich: More isn’t always better. If you load it too heavily, it’ll be difficult to flip and eat.
- Not letting it cool: Give it a minute before diving in; trust me, it makes for a better eating experience!
Frequently Asked Questions (FAQ)
Can I use different types of cheese?
Absolutely! Feel free to swap in your favorite cheese, but I recommend something that melts well.
How can I make this vegan?
You can easily use vegan cheese and butter. Just be sure to find one that melts nicely.
What if I don’t have balsamic vinegar?
Red wine vinegar or apple cider vinegar could work, but the taste will vary!
Cooking Tools You’ll Need
- A non-stick skillet: This is crucial for ensuring your grilled cheese doesn’t stick and burns.
- A cutting board and knife: For slicing your fruits and onions.
- A spatula: To help flip your sandwiches without ending up with a gooey mess.
Final Thoughts
This Pear & Apple Grilled Cheese With Caramelized Onions recipe is not just another sandwich; it’s an experience that brings warmth and joy. Whether you’re indulging after a long day, hosting a cozy gathering, or simply treating yourself to something nice, this dish shines brightly.
I think what I love most about it is that it’s versatile—perfect for healthy meal plans for two or a comforting solo dinner. It comes together with minimal effort and maximum satisfaction.
So, what are you waiting for? Dive into this recipe and make it your own! If you enjoyed this recipe, don’t forget to save it on Pinterest or share it with a friend!
Pear & Apple Grilled Cheese With Caramelized Onions
Ingredients
Main Ingredients
- 4 slices sourdough bread Hearty texture and flavor.
- 2 tablespoons unsalted butter Adds richness for a crispy exterior.
- 1 medium pear, thinly sliced Sweet and juicy; provides contrast.
- 1 medium apple, thinly sliced Tartness complements the pear.
- 1 medium onion, thinly sliced Caramelizes to add sweetness.
- 1 cup shredded sharp cheddar cheese Provides melty goodness.
- 1 tablespoon balsamic vinegar Enhances overall flavor.
- to taste salt Enhances all flavors.
- to taste black pepper Adds a touch of warmth.
Instructions
Caramelize the Onions
- Melt 1 tablespoon of unsalted butter in a skillet over medium heat.
- Add the sliced onions and a pinch of salt, cooking and stirring occasionally for about 10 minutes until golden brown and softened.
- Stir in 1 tablespoon of balsamic vinegar and cook for an additional 2-3 minutes until the vinegar reduces slightly.
Layer the Grilled Cheese
- In the same skillet, melt the remaining tablespoon of butter over medium heat.
- On two slices of sourdough, layer half of the sharp cheddar cheese.
- Evenly distribute the caramelized onions, then add the apple slices, followed by the pear slices.
- Top with the remaining cheese and cover with the other two slices of bread.
Grill the Sandwiches
- Grill one side in the skillet for about 4-5 minutes, checking for golden-brown color.
- Carefully flip and grill the other side for another 4-5 minutes until the cheese is melted.
- Let them cool slightly before slicing in half and enjoy warm.