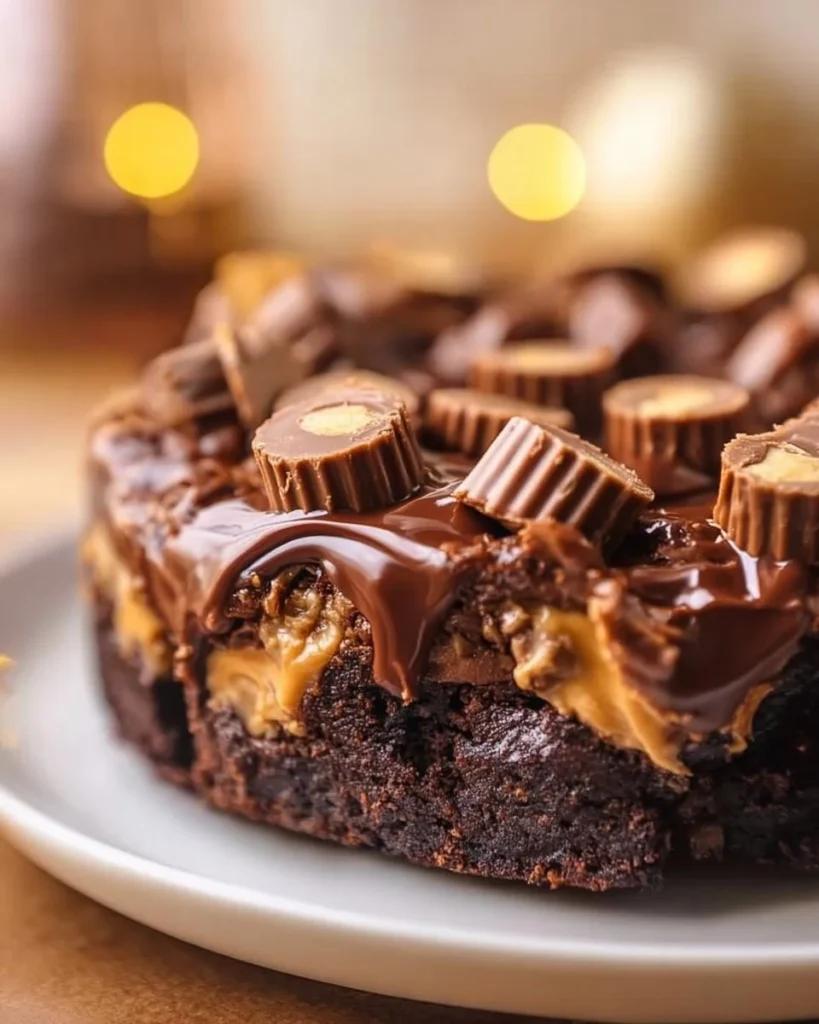

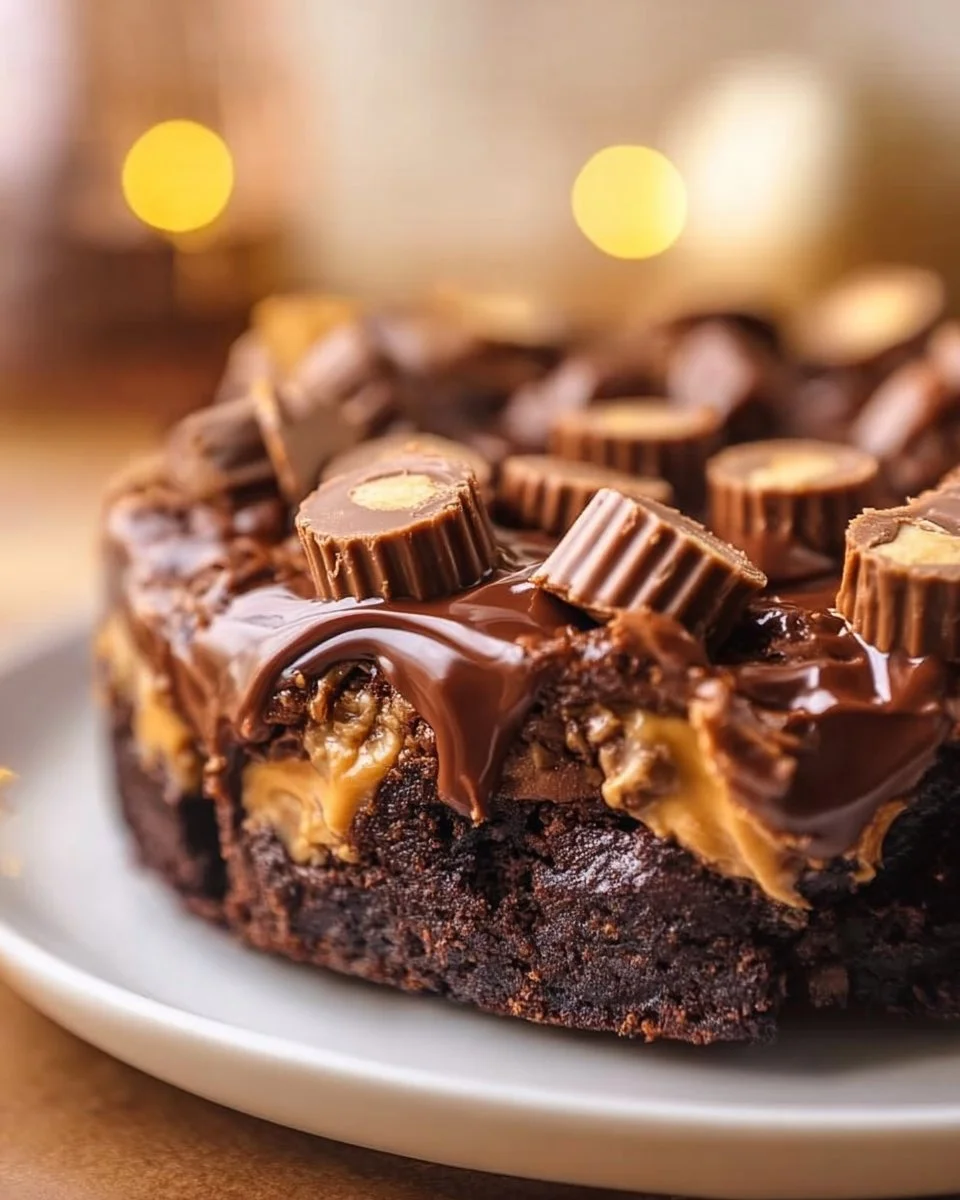
The Best Easy Reese’s Peanut Butter Cup Earthquake Cake
There’s something magical about the combination of chocolate and peanut butter, right? It’s a culinary match made in heaven. I remember the first time I stumbled upon this Reese’s Peanut Butter Cup Earthquake Cake recipe. It was a rainy Saturday afternoon, and the comfy couch was calling my name, but my sweet tooth was sounding a different alarm. I rummaged through my kitchen like a determined treasure hunter and found a box of chocolate cake mix hiding behind some half-used bags of flour. Ah-ha! That was my golden ticket!
With a lack of plans and an overflowing desire for something decadent, I turned on some music and rolled up my sleeves. Honestly, I didn’t even know what I was getting into—the notion of an "earthquake cake" and all those gooey flavors thrilled me but also had me a bit intimidated. I’ll confess, the first trial was a mixed bag of delightful surprises and a handful of “oops” moments. Let’s just say the entire kitchen smelled like a heavenly chocolate factory, but the cake itself… well, let’s just say it had its moments of chaos.
Fast forward a couple of messy attempts, and I’ve nailed it down to a true show-stopper! This cake evokes cozy memories that I cherish, filled with laughter and plenty of peanut butter-loving friends (and some not so brave ones!). There’s something so fun about watching your loved ones discover pools of gooey peanut butter hidden beneath layers of rich chocolate cake. This recipe isn’t just a cake; it’s a method for gathering people, sharing stories, and, let’s be real, getting your hands a little dirty.
Let’s dive into why this sweet disaster of a cake is something you absolutely need in your life.
Why You’ll Love This Recipe
- Easy to Make: Seriously, if you can mix a few ingredients in a bowl, you can conquer this cake like a pro.
- Crowd-Pleaser: Whether you’re feeding friends or your family, this cake is like a hug in dessert form. Trust me, kids and adults alike love it!
- Decadent Layers: The chocolate, peanut butter, and surprise fillings make each bite an adventure, just like life!
- Versatile: You can swap out ingredients, add toppings, or even throw in some seasonal spices. The possibilities are endless!
- Leftover Heaven: If you’re lucky enough to have leftovers, they make for a fantastic treat for easy weeknight dinners or snack attacks.
- Comfort in Every Bite: This cake packs a nostalgia punch, giving you all the cozy feelings on cool evenings.
What Makes This Recipe Special?
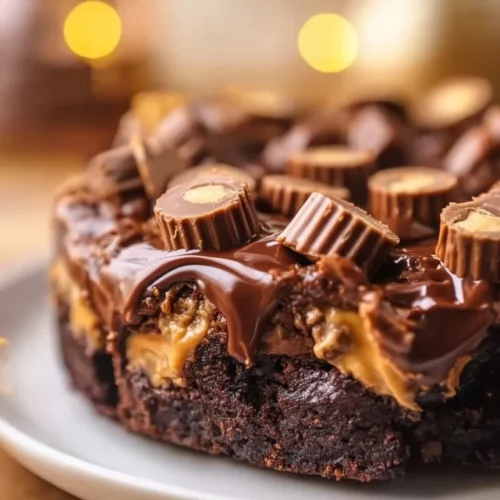
Oh, where to begin?! First off, the flavor combination is undeniably iconic. You have the moist, rich chocolate cake base, and then you layer it with peanut butter goodness. I’ll tell you, when the chocolate cake is still warm and that creamy peanut butter layer melts just enough to ooze through, it’s pure bliss.
I also love how this cake reminds me of those cherished childhood moments. Whenever my mom made chocolate cake for special occasions, it became a family ritual. And let’s not forget what happens when you poke into that cake with a fork! It’s like an earthquake has hit your dessert, revealing a treasure of melted chocolate and peanut butter beneath. It’s messy, it’s chaotic, and that makes it all the more delightful. Plus, those crispy edges? To die for!
Ingredients
-
1 chocolate cake mix: The star of the show! It provides fluffy and moist cake. Picking a good quality mix is vital, but honestly, any of your favorites will work—just avoid the ones with weird ingredients!
-
1 cup water: Effective diluter and moisture keeper. Seriously, don’t skip on the water—it’s crucial!
-
1/3 cup vegetable oil: Ensures that your cake comes out tender. You can also use melted coconut oil for an added touch of tropical goodness.
-
3 large eggs: They are the binders that work their magic together with the oils and water. Don’t use expired eggs, trust me; it’s a disaster waiting to happen.
-
1 cup creamy peanut butter: The heart of this cake, bringing flavors that make you swoon. I personally love using Jif or Skippy because they smooth out beautifully without being grainy.
-
1 cup powdered sugar: Softens and sweetens that peanut butter filling. Pro tip: sift it before mixing to avoid a lumpy situation.
-
1 cup Reese’s peanut butter cups (chopped): Because what’s better than regular peanut butter? More peanut butter! Use mini cups to maximize chocolate to peanut butter goodness!
-
1 cup chocolate chips: You can never go wrong with extra chocolate. Use semi-sweet or dark chocolate, depending on your personal preference.
-
1 cup chopped walnuts (optional): They add fantastic crunch and contrast; skip them if you’re not a fan!
How to Make It Step-by-Step
Alright, let’s get down to the nitty-gritty! Get your oven preheated to 350°F (175°C) because things are about to get delicious.
-
Prepare Your Pan: Grease and flour a 9×13-inch baking dish like your baking life depends on it. Otherwise, you might encounter the tragic disaster of a “stuck cake.” Trust me.
-
Mix It Up: In a large mixing bowl, combine that chocolate cake mix, water, vegetable oil, and eggs. I recommend using a hand mixer; it really makes life easier! Mix until everything is silky and well integrated. That sweet chocolate aroma? Yesss, please!!!
-
The Cake Layering Part: Pour half of that luscious chocolate cake batter into your well-prepared dish. It’ll look fantastic already, but hold tight!
-
Peanut Butter Magic: Grab another bowl to mix together the peanut butter and powdered sugar until smooth. It should be thick but spreadable; if it’s not, add a splash of milk to loosen it just a smidge. Drop spoonfuls of this mixture over the cake batter—don’t try to spread it out evenly. The more chaotic, the better!
-
Add the Goodies: Now, sprinkle those chopped Reese’s peanut butter cups and chocolate chips on top. Good Lord, it’s already looking incredible!
-
Finish the Job: Pour the remaining cake batter over everything, ensuring you cover those gooey fillings as best you can.
-
Bake the Beauty: Pop that baking dish into the preheated oven and bake for 30-35 minutes. Honestly, you’ll know it’s done when your kitchen is filled with that irresistible smell of chocolate, and a toothpick inserted in the center comes out clean.
-
Cool Off: Once baked, let your cake cool completely before slicing. I know, waiting can be torturous, but it really lets the flavors meld together beautifully.
Tips for this stage? Don’t be tempted to peek too often while baking! Opening that oven door can lead to sinking disasters—yikes!
Tips for Best Results
- Don’t overmix the batter; it can lead to dense cake. Just mix until the ingredients are combined.
- Allow your cake to cool in the pan for a bit before moving it to a wire rack; it ensures you won’t lose your masterpiece in the process!
- Swapping the chocolate cake mix for a gluten-free option is a fantastic alternative for those adhering to a gluten-free diet.
Ingredient Substitutions & Variations
If you want to jazz it up a bit, think seasonal! Swapping peanut butter for almond butter or adding some cinnamon can provide an unexpected twist.
Are you feeling extra wild? Mix in some caramel chunks along with those chocolate chips for a salted caramel flair. You can also use dark chocolate cake mix for a richer flavor profile—hello, chocolate lovers!
For a healthier version, sub in Greek yogurt for some of that oil, and use a sugar alternative. The world is your oyster!
Directions
- Preheat your oven to 350°F (175°C).
- Grease and flour a 9×13-inch baking dish.
- In a large bowl, combine the chocolate cake mix, water, vegetable oil, and eggs. Mix until well combined.
- Pour half of the cake batter into the prepared baking dish.
- In a separate bowl, mix together the peanut butter and powdered sugar until smooth. Drop spoonfuls of this mixture over the cake batter, then sprinkle the chopped Reese’s peanut butter cups and chocolate chips on top.
- Pour the remaining cake batter over the fillings.
- Bake for 30-35 minutes or until a toothpick inserted in the center comes out clean. The cake will have cracks on top.
- Allow to cool before serving. Enjoy your decadent cake!
Pairing Ideas (Drinks, Sides, etc.)
Honestly? This cake stands perfectly on its own, but if you want to elevate your profiling, consider a scoop of vanilla ice cream on the side. It’s the ultimate contrast—a warm, gooey cake meets cold ice cream in a splendid union! If you’re feeling adventurous, a hot cup of coffee or a glass of cold milk is an almost obligatory pairing. Both amplify the flavors wonderfully!
If you’re looking for lighter bites, consider pairing with a fresh fruit salad or cream cheese frosting for extra indulgence. And quite frankly, this cake and a rom-com on a cozy evening is perfection!
How to Store and Reheat Leftovers
Storing your Earthquake Cake is quite simple! Just keep it in an airtight container lined with parchment paper to absorb any moisture. It can last up to a week, but honestly, it’ll probably be gobbled up way before then (or at least I hope so)!
When it comes to leftovers, you can easily warm pieces of this luscious cake in the microwave for about 15-20 seconds—enough to revive those melty flavors. Oops, just don’t allow it to explode in the microwave; that would be a real bummer.
Make-Ahead and Freezer Tips
You can prepare the batter ahead of time! Mix everything up, cover it tightly, and stick it into the fridge for a day. Just be mindful that the baking time may increase a tad when using cold batter.
Freezing is also an option. Freeze individual slices wrapped tightly in plastic, then cover them with foil. Just thaw them at room temperature or pop them in the microwave for a quick fix!
Common Mistakes to Avoid
- Don’t skip greasing and flouring that pan! It will lead to a heartbreaking scene of cake stuck to the bottom.
- You’ve got to let it cool a little before digging in; trust me, letting it rest for 10-15 minutes makes all the difference!
- Overbaking can lead to dry cake. Watch that timer; it’s your friend!
Frequently Asked Questions (FAQ)
Q: Can I use a different nut butter?
A: Absolutely! Almond butter or cashew butter would be delicious substitutes. Just ensure they have a similar consistency to peanut butter.
Q: What if I forgot to buy chocolate chips?
A: No worries! Feel free to add some chopped-up chocolate bars or skip altogether if you’re feeling like a minimalist.
Q: Can this recipe be halved?
A: Sure thing! Just divide everything by half and use an 8×8-inch pan instead. Baking time will be a bit shorter, so keep an eye on it!
Cooking Tools You’ll Need
- Large Mixing Bowl: For those funny cake batter moments.
- Hand Mixer: Makes life easier—totally worth it for baking.
- Measuring Cups: To get those ingredient amounts just right.
- Rubber Spatula: Smooth out that peanut butter filling like it’s your business!
Final Thoughts
This Reese’s Peanut Butter Cup Earthquake Cake is more than just dessert; it’s a moment you can create with loved ones, a memory you can share, and lessons learned through a bit of kitchen chaos. Each bite brings back smiles, laughter, and the sweet taste of nostalgia. The planning and mess that come with baking might seem daunting, but when it all comes together in a spectacularly messy cake, it’s truly a rewarding experience.
And really, isn’t that what cooking is all about? Connecting, creating, and, quite frankly, consuming delicious things! So, put on your apron, crank up that music, and let the sweet adventure begin.
If you enjoyed this recipe, don’t forget to save it on Pinterest or share it with a friend! Let’s spread the joy of baking delicious cakes far and wide!
Reese’s Peanut Butter Cup Earthquake Cake
Ingredients
For the cake
- 1 box chocolate cake mix A good quality mix is vital; avoid those with weird ingredients.
- 1 cup water Essential for moisture.
- 1/3 cup vegetable oil Can be substituted with melted coconut oil.
- 3 large eggs Do not use expired eggs.
For the peanut butter layer
- 1 cup creamy peanut butter Jif or Skippy recommended.
- 1 cup powdered sugar Sift before mixing to avoid lumps.
For toppings
- 1 cup Reese’s peanut butter cups (chopped) Use mini cups for better distribution.
- 1 cup chocolate chips Use semi-sweet or dark chocolate.
- 1 cup chopped walnuts (optional) Skip if not a fan.
Instructions
Preparation
- Preheat your oven to 350°F (175°C).
- Grease and flour a 9x13-inch baking dish.
Mixing the Batter
- In a large mixing bowl, combine the chocolate cake mix, water, vegetable oil, and eggs. Mix until smooth.
Layering
- Pour half of the cake batter into the prepared dish.
- In another bowl, mix together the peanut butter and powdered sugar until smooth, then drop spoonfuls over the cake batter.
- Sprinkle the chopped Reese’s peanut butter cups and chocolate chips on top.
- Pour the remaining cake batter over everything.
Baking
- Bake for 30-35 minutes, or until a toothpick inserted in the center comes out clean.
- Allow to cool before slicing.