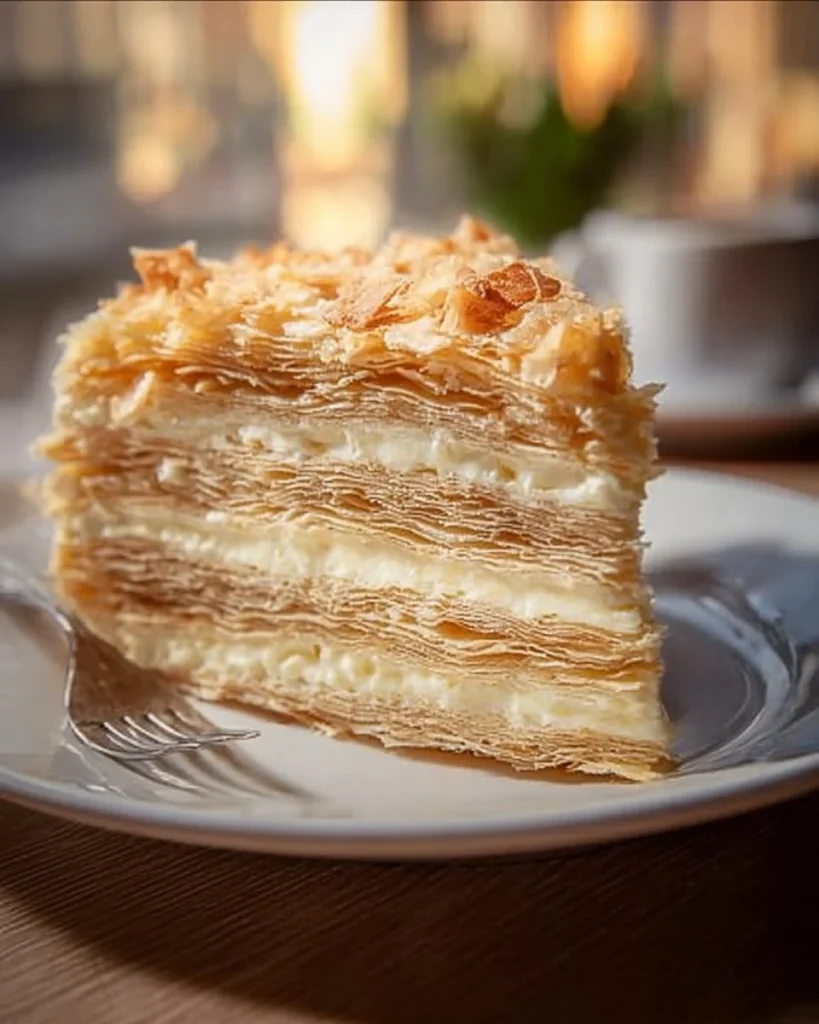

Easy and Delicious Russian Napoleon Cake Recipe
Ah, the Russian Napoleon Cake — a dessert so delicate, so luxurious, it feels like a slice of heaven with every bite. Honestly, reminiscing about the first time I attempted this cake takes me on a rollercoaster of baking emotions. It was a rainy Saturday afternoon, and the kind of crisp air that called for something special wafted through my kitchen. I had read countless food blogs that glorified this towering pastry, and I thought, “Why not? I can handle it!” Let’s just say my initial enthusiasm was met with quite a bit of drama (spoiler alert: flour went everywhere).
You see, making puff pastry from scratch sounds straight out of a baking show, doesn’t it? I remember the moment I realized my dough was more of a sticky mess than a masterpiece. But hey, that’s the beauty of home baking! There’s a certain magic in the chaos, a comforting air of “Oops, I didn’t expect that!” that permeates the kitchen. And while my first attempt was an exercise in patience — and a mild exercise in sweeping up flour — I eventually nailed it.
So why does this recipe matter to me? Well, it’s full of memories, hugs in cake form, and a family favorite no one can resist. It’s a showstopper worthy of any gathering or a cozy night in, served with a side of nostalgia and joy. As the layers of golden puff pastry and silky custard come together, the smell envelops me like my grandma’s embrace — warm, inviting, and downright delightful. When you finally cut into that masterpiece, it’s like unveiling a treasure, and every slice is a moment waiting to be savored.
If you are ready for a journey of flour, butter, and bliss, let’s dive into why this Russian Napoleon Cake is more than just a dessert; it’s a celebration of life’s little joys.
Why You’ll Love This Recipe
-
Easier Than It Looks: Sure, puff pastry sounds intimidating, but with a little patience and a bit of elbow grease, you’ll be a pro.
-
Versatile Comfort: This cake knows no boundaries; it’s perfect for a holiday gathering, a birthday celebration, or just to enjoy on a regular Tuesday night when you need a pick-me-up.
-
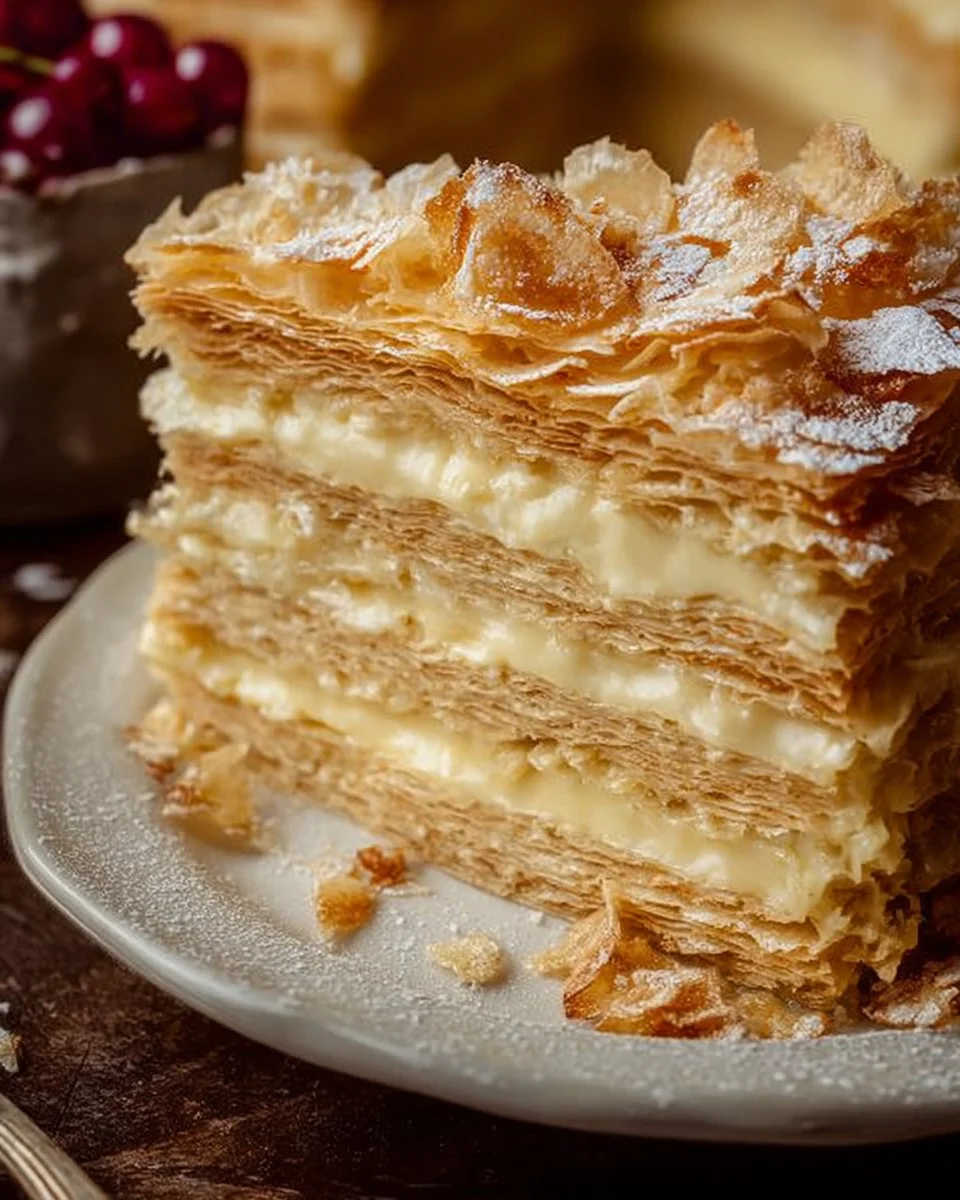
Impressive Presentation: The layers create a visual feast—your guests will be in awe and you’ll bask in the glory of your baking prowess.
-
Picky Eater Approved: With creamy custard and flaky pastry, this dessert is unlikely to meet resistance, no matter how discerning your audience.
-
Leftover Magic: If you manage to have leftovers, they hold up beautifully—just as delicious the next day. This cake is a treat that tastes like it was made yesterday!
-
It Feels Like a Hug: Honestly, this cake delivers comfort in a very literal way; it simply embraces you with its flavors and textures.
What Makes This Recipe Special?
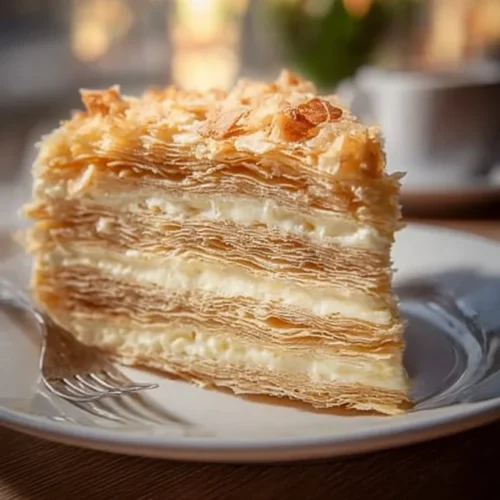
There’s something genuinely enchanting about the layers in a Napoleon Cake. Each one tells a story — the crispness of the baked pastry paired with the velvety custard filling creates a dance of textures. The golden, flaky layers are not only satisfying to bite into but also to create. The beauty is in the process. It’s a baking adventure that involves a few different techniques but rewards you with a cake that’s both regal and rustic at the same time.
As I reflect on my journey with this cake, I can’t help but think about the tiny kitchen mishaps. Flour explosions, butter mishaps, and the occasional stray egg yolk made for a delightful day of play and, at times, utter chaos. These quirky moments created not just cake but cherished memories. To be real, it’s not just the outcome; it’s the experience that matters.
Ingredients
To make the quintessential Russian Napoleon Cake, you only need a handful of ingredients. Here’s what you’ll need:
For the Puff Pastry:
- 2 cups all-purpose flour
- 1 cup unsalted butter (cold)
- 1/2 cup cold water
- 1/2 teaspoon salt
For the Custard Filling:
- 2 cups whole milk
- 1/2 cup granulated sugar
- 1/4 cup cornstarch
- 4 large egg yolks
- 1 teaspoon vanilla extract
- 1/4 cup unsalted butter (at room temperature)
Let’s talk a bit about these ingredients, shall we? The cold butter is essential; it creates those beautiful flaky layers in the puff pastry that are characteristic of this cake. I like to use unsalted butter — it gives you more control over the sweetness of the finished product.
When it comes to the flour, all-purpose is the way to go. Don’t skimp because low-quality flour can lead to an undesirable texture. Trust me on this one; nobody wants dense layers instead of light, airy goodness!
The custard? Oh, the custard! It’s rich, creamy, and absolutely the pièce de résistance. Be sure to whisk your egg yolks properly; otherwise, you may end up with scrambled eggs — which is not what we want in our beautiful cake.
One note of caution: if you think you can skip the chilling time for your dough, think again! Allowing it to chill not only helps with the flakiness of the pastry but also makes it easier to work with. Don’t rush it!
How to Make It Step-by-Step
Now, let’s roll up those sleeves and get started. Baking can feel daunting, but with this guide, you’ll feel supported every step of the way.
Step 1: Making the Puff Pastry
In a cozy nook of my kitchen, I begin by mixing the flour and salt in a large bowl. The aroma of flour is nostalgic and brings back memories of baking with my mom. Using a pastry cutter (or honestly, your trusty fork or hands if you don’t have one), cut the cold butter into the flour until the mixture resembles coarse crumbs, like little fluffy clouds.
As I work, I remind myself gently not to overdo it — we want to keep some chunks of butter intact for that oh-so-essential flakiness.
Once that’s done, I gradually add the cold water. You’ll want to stir that dough gently until it comes together. Too much mixing will create crusty pastry instead of tender layers. Wrap it all up in plastic wrap and let it hang out in the fridge for an hour — trust me, this makes a world of difference!
Step 2: Roll Out the Dough
After what feels like an eternity (it’s really just an hour, but who’s counting?), it’s time to roll out the dough. Flour your surface generously; trust me, this part gets a little messy. Roll it out into very thin sheets, because those delicate pastries need their space to breath.
I opt for rectangles because I like to keep things easy, but feel free to get creative with shapes if you’re feeling artsy! Once you have your rectangles, bake them at 400°F (200°C) until they are golden brown and perfectly puffed up.
If I’m being honest, there’s something immensely satisfying about seeing those layers rise in the oven. You look at them and think, “Yes, this is what triumph looks like!”
Step 3: Creating the Amazing Custard
This is the part where my home transforms into a little pastry heaven. In a medium saucepan, combine milk, granulated sugar, and cornstarch. Over medium heat, stir until it bubbles and thickens.
Meanwhile, in another bowl, whisk together the egg yolks. Once the milk mixture is warm, I quickly temper the egg yolks by slowly adding in a bit of the hot mixture (stirring constantly to avoid scrambled eggs). Game changer!
Returning the tempered egg mixture to the saucepan, I cook it until it thickens — about 5 minutes. In go the vanilla extract and butter, and as they melt into the custard, the smell wafts through my kitchen. It’s the kind of magic that makes you feel all warm inside.
Step 4: Assembling the Napoleon Cake
It’s showtime! Layer your baked pastry with that silky custard. Start with a layer of the pastry, then generous spoonfuls of custard, repeating until you’ve exhausted your layers. My secret? I always keep a few crumbs for the top because getting that perfect “look at me!” presentation is essential.
Once you’re done, pop this beauty into the fridge for a few hours, allowing the layers to meld together like a great friendship.
Tips for Best Results
Here are a few tidbits from my kitchen disasters that will make your baking journey smoother!
-
Patience is Key: Letting the puff pastry chill is essential. Don’t skip this step or you could end up with a dense mess instead of flakiness.
-
Oven Thermometer: Invest in one if you don’t have it. Oven temperatures can vary significantly and proper baking is crucial, especially for the pastry.
-
Use Fresh Ingredients: Trust me, fresh products yield better flavor and texture. Old vanilla can turn your custard from divine to decidedly flat.
Ingredient Substitutions & Variations
Feeling adventurous? There are so many ways to tweak this recipe!
-
Dairy Alternatives: If you want to go for a non-dairy custard, coconut or almond milk can work wonders. It will lend a unique flavor, too!
-
Flavor Infusions: Consider infusing your milk with spices like cinnamon or nutmeg while warming it for an unexpected twist.
-
Healthy Swaps: For those looking for a more health-conscious option, use whole grain flour instead of all-purpose.
-
Add-Ins: Want a bit of fruitiness? Try layering in some fresh berries or whipped cream between the layers for added flair.
Directions
To put this all together, here’s a quick recap of the steps you’ll follow:
- Make the puff pastry dough and chill for 1 hour.
- Roll the dough into thin sheets, cut into rectangles and bake at 400°F (200°C) until golden.
- Whisk the custard filling together on the stovetop until thickened, adding vanilla and butter at the end.
- Assemble the layers starting with baked pastry and custard, repeating until all are used. Chill in the refrigerator for several hours before slicing.
Pair this decadent treat with a cup of strong coffee or tea for a baking moment that feels complete. And let’s be real — a romantic comedy playing in the background? Perfection!

How to Store and Reheat Leftovers
If you have any lucky leftovers (which I highly recommend you do), store them in the fridge for 3-4 days in an airtight container. The cake actually develops more flavor as it sits! Just be careful not to squish the layers — we want to preserve that magnificent look.
Honestly, I tend to find myself enjoying these cakes straight out of the fridge — it’s like a midnight snack that feels both indulgent and surprisingly wholesome in its comfort.
Make-Ahead and Freezer Tips
This cake can be assembled a day ahead; just don’t add any garnishes until the day of serving. Freezing, however, isn’t ideal for the assembled cake as it can affect the texture of the custard.
I prefer to freeze the baked puff pastry layers individually and store them in a heavy-duty freezer bag. When you’re ready to use, thaw the layers at room temperature and whip up the custard fresh.
Common Mistakes to Avoid
-
Overworking the Dough: You want to handle the dough as little as possible — you’re aiming for a tender pastry, not a chewy one.
-
Skipping the Chilling: It’s tempting to rush — I get it! But skipping chilling time results in a soggier texture.
-
Not Timing: Keep an eye on the baking process to avoid burnt or undercooked layers.
-
Ignoring the Tempering Process: This step is crucial — if you don’t temper your egg yolks properly, you’ll end up with a custard you didn’t want at all.
Frequently Asked Questions (FAQ)
Can I use store-bought puff pastry?
Yes! It cuts down on prep time and is perfect for those days when you want something quick and delicious.
What if my custard doesn’t thicken?
Increase the heat slowly while constantly stirring. If needed, you can add a bit more cornstarch. Be careful not to scramble those eggs!
How long does it need to chill?
At least 3-4 hours; overnight is even better for the flavors to meld beautifully.
Cooking Tools You’ll Need
- Mixing bowls
- Whisk
- Pastry cutter or fork
- Rolling pin
- Baking sheets
- Parchment paper
- Heavy-duty plastic wrap
Final Thoughts
Baking the Russian Napoleon Cake has been a delightful journey through flour, butter, and many heartfelt memories. Each slice evokes warmth and nostalgia, reminding me of where I started — amidst flour clouds and the love of family gatherings. Now this beautiful cake is a cherished recipe I’m proud to share.
As you embark on making this delicious dish, I encourage you to add your touch, share stories from your kitchen chaos, and enjoy every second of creating your version of this delightful masterpiece. If you enjoyed this recipe, don’t forget to save it on Pinterest or share it with a friend!
Russian Napoleon Cake
Ingredients
For the Puff Pastry
- 2 cups all-purpose flour Use high-quality flour for best results.
- 1 cup unsalted butter (cold) Cold butter is essential for flaky layers.
- 1/2 cup cold water Gradually add to form the dough.
- 1/2 teaspoon salt Enhances the flavor of the pastry.
For the Custard Filling
- 2 cups whole milk Full-fat milk gives the creamiest texture.
- 1/2 cup granulated sugar Adjust sweetness to taste.
- 1/4 cup cornstarch Used to thicken the custard.
- 4 large egg yolks Whisk well to prevent scrambling.
- 1 teaspoon vanilla extract Adds flavor to the custard.
- 1/4 cup unsalted butter (at room temperature) Incorporates into the custard for richness.
Instructions
Making the Puff Pastry
- Mix flour and salt in a large bowl. Cut cold butter into the flour with a pastry cutter until the mixture resembles coarse crumbs.
- Gradually add cold water and stir gently until the dough comes together. Avoid overmixing.
- Wrap the dough in plastic wrap and chill in the fridge for 1 hour.
Roll Out the Dough
- Flour your surface and roll the chilled dough into thin sheets. Cut into rectangles.
- Bake at 400°F (200°C) until golden brown and puffed, about 15-20 minutes.
Creating the Custard
- In a medium saucepan, combine milk, granulated sugar, and cornstarch. Stir over medium heat until bubbling and thickened.
- Whisk egg yolks in a separate bowl. Temper the egg yolks by slowly adding a bit of the hot milk mixture while stirring.
- Return the tempered yolk mixture to the saucepan and continue cooking until thickened, about 5 minutes. Stir in vanilla extract and butter until melted.
Assembling the Napoleon Cake
- Layer the baked pastry with custard, starting with a pastry layer followed by custard. Repeat until all layers are used.
- Chill in the refrigerator for at least 3-4 hours before slicing.