
Easy and Delicious Banana Split Dump Cake Recipe
There’s something undeniably comforting about a dessert that embraces chaos. Honestly, if I had a dollar for every time a recipe morphed into a delicious accident in my kitchen, I could probably fund my own culinary retreat! One such delightful disaster led me to discover the magic of a Banana Split Dump Cake—a muddy, delightful concoction that’s as simple as it is scrumptious. Picture this: a bustling afternoon, the sweet smell of ripe bananas hanging in the air, and a light dusting of laughter in my cozy kitchen. The kids, underfoot as always, were alternating between pestering me for snacks and engaging in their latest game of hopscotch in the living room. I just knew I wanted to create something special, something cozy that would feel like a hug in a bowl at the end of a long day.
When I stumbled upon this “dump” cake concept, I thought, “Hey, that sounds easy enough!” Little did I know that the simple unadulterated joy it would bring, both to my family and my tired self, would become a staple dessert in our home. The beautiful chaos that is a dump cake invites you to layer ingredients without worrying about finesse. All you need are a few pantry staples and a couple of ripe bananas. Add in some chocolate, a sprinkle of nuts if you’re feeling fancy, and BOOM! You’ve transformed a mundane weekday into a sweet celebration.
As I prepped this dish, I couldn’t help but reminisce about family bake-offs during the holidays. My mother’s wild attempts at extravagant cakes that, let’s be real, often left a bit to be desired aesthetically but had us all reeling in delight. Cooking is more than just a series of ingredients; it’s about relationships, those moments spent creating and sharing food. So, if you’ve ever found yourself knee-deep in flour or fumbled while searching for a missing measuring cup, you’re not alone, my friend. This Banana Split Dump Cake is here to embrace the mess and lead the way to dessert bliss!
Why You’ll Love This Recipe
-
Ease of Preparation: This dump cake is the epitome of swift, with minimal fuss involved—perfect for those easy weeknight dinners or cravings that hit at 9 PM!
-
Comforting and Coziness: Every bite oozes sweet nostalgia. The combination of warm bananas, chocolate chips, and whipped topping feels like home on a plate.
-
Leftover Dreams: If you’re lucky enough to have any left after a family gathering, this cake slices like a dream and makes a delightful breakfast treat (shh, don’t tell my diet).
-
Picky-Eater Approved: Kids will be asking for seconds, or even thirds. The blend of chocolate and bananas speaks their language!
-
Meal Prep Win: This dessert can easily be made ahead of time, allowing for some stress-free entertaining. Make it in advance, keep it in the fridge, and reheat as needed for a quick ready meal moment.
-
Versatile Twists: Make it your own! You can customize this cake by adding other toppings or mix-ins. The possibilities are endless!
What Makes This Recipe Special?
This isn’t just any old dessert; it’s a fusion of flavors that reminds me of summertime ice cream shops—where a wholesome banana split was my go-to order. The layers of bananas provide a natural sweetness that pairs perfectly with the chocolate chips, transforming what could be just another cake into a flavor explosion. Most importantly, it’s the memories created around the table that add an extra layer of richness. This cake is a celebration of family and friends, perfect for gatherings or lazy afternoons at home. The whimsical points of each ingredient create a beautiful tapestry of taste, and let’s be honest, who doesn’t love a dessert that gives off healthy comfort food vibes while being deliciously indulgent?
Ingredients
-
3 ripe bananas, sliced – Not only do they lend sweetness, but they also keep the cake moist. (Don’t use overripe bananas; they tend to turn mushy in this particular recipe, trust me!)
-
1 box yellow cake mix – The star of the show! Use whatever brand you fancy. Sometimes, I lean towards organic mixes because they tend to have fewer artificial ingredients.
-
1 cup creamy whipped topping – This is where the magic happens and makes every serving feel like a cloud.
-
1 cup chocolate chips – Because chocolate makes everything better! I prefer semi-sweet, but feel free to use dark or milk chocolate, or even white chocolate if you want to change things up.
-
1/2 cup unsalted butter, melted – This is the glue that holds the cake together. Don’t skip out on butter; please, it’s a must!
-
1/2 cup walnuts (optional) – This gives a lovely crunch and texture, but if you’re not a fan, feel free to leave them out!
-
1/2 cup maraschino cherries (for topping) – A classic banana split flair; these cherries take your dessert presentation to a whole new level!
How to Make It Step-by-Step
-
Preheat that Oven: Set it to 350°F (175°C) because we want to get started on this culinary adventure!
-
Layer those Bananas: Grab a baking dish—size doesn’t need to be too precise; I usually use something around 9×13. Layer the freshly sliced bananas at the bottom. It’s like laying the foundation for a banana empire!
-
Cake Mix Time: Now, here comes the “dump” part; in comes the dry yellow cake mix. Pour it evenly over your banana layer like confetti at a celebration. Make sure to cover every inch.
-
Butter Drizzle Delight: Melt the unsalted butter and then drizzle it across the top of the cake mix. I can’t stress this enough: cover as much as you can! (Oops, I may have missed a small section in my first attempt—let’s say it turned out a bit dry. Don’t make my mistake!)
-
Chips and Nuts: Here’s where the fun continues: sprinkle the chocolate chips and walnuts over the top. Don’t be shy; give it some personality!
-
Bake It: Slide your masterpiece into the preheated oven and bake for about 30-35 minutes, or until the top turns golden brown and your kitchen starts smelling like pure bliss. Seriously, you’ll want to start a dance party at this point.
-
Cool Down: Once it’s baked, let it cool for a bit. It’ll be tempting, but resist the urge to dive in right away. Allow it to set a little—your patience will be rewarded.
-
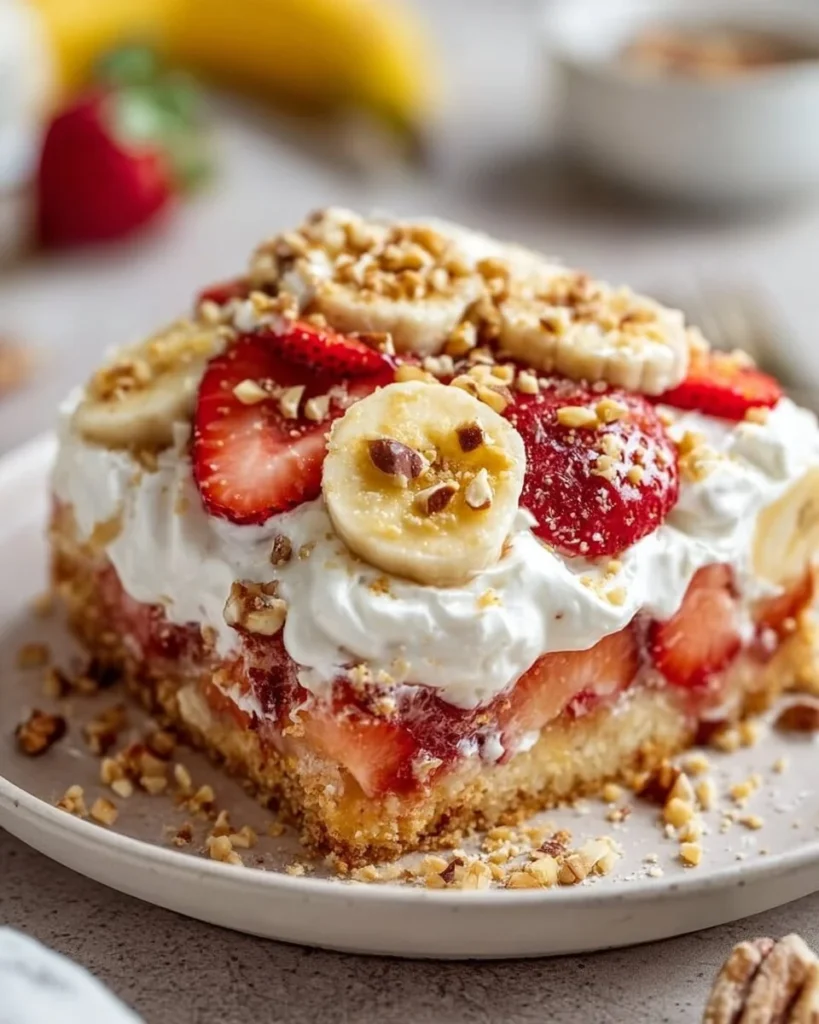
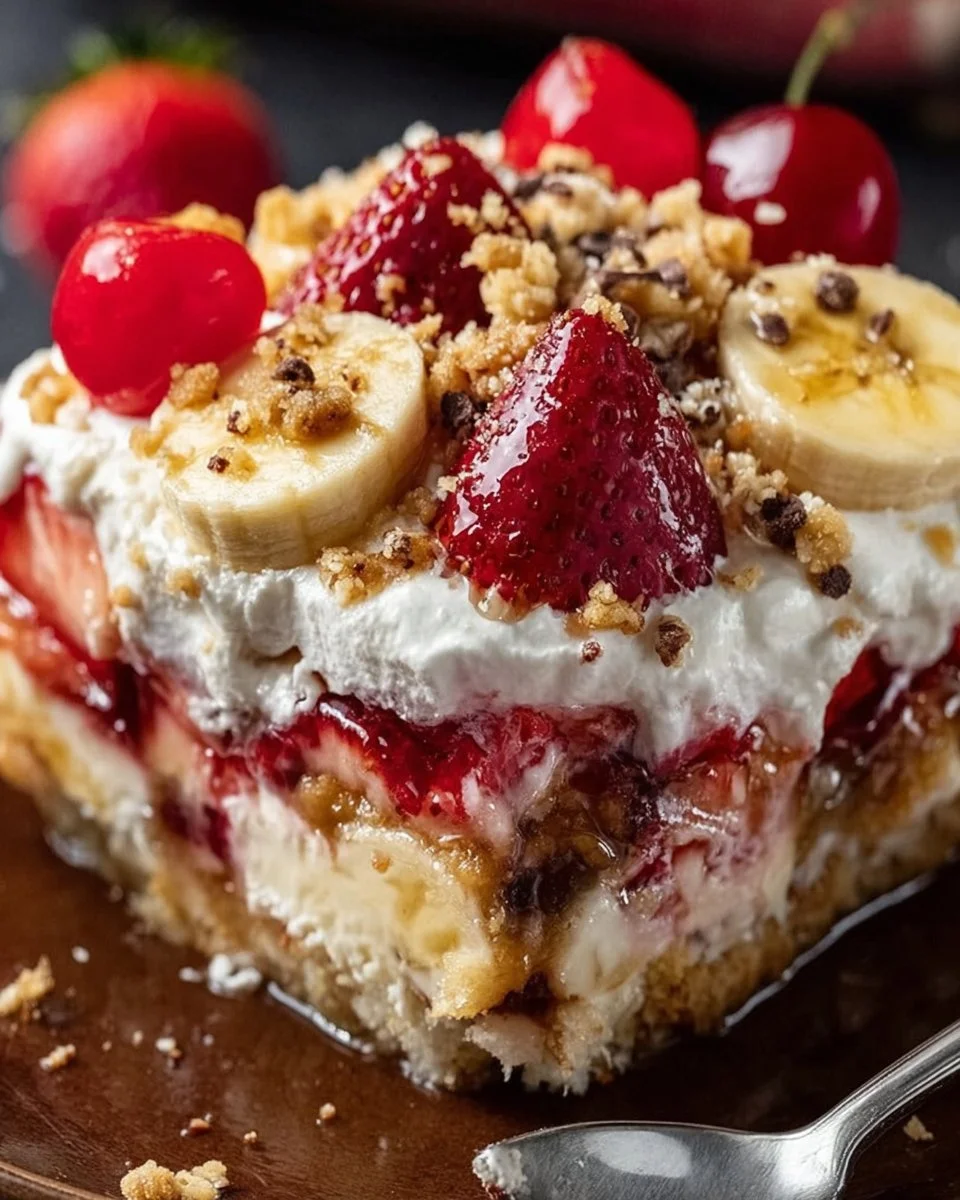
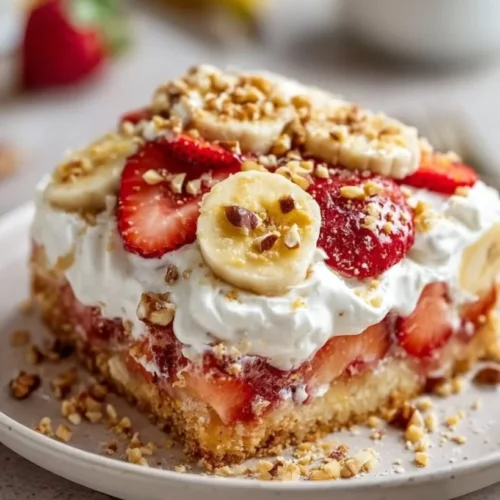
Serve It Up: Spoon generous helpings into bowls, top each with creamy whipped topping, and a cherry on the crown. Snap a pic because it’s going to be Instagram-worthy!
Tips for Best Results
-
Don’t Skip on Ripeness: Choose the perfect bananas. They need to be firm and ripe but not overripe. A gentle touch will help you feel them out.
-
Use Your Favorite Cake Mix: Make this recipe your own by using chocolate, vanilla, or even lemon cake mix to shake things up; the flavor profiles are endless!
-
Mix-in Madness: Feel free to toss in other toppings like coconut flakes or butterscotch chips. The best part about cooking is your ability to play around with flavors.
-
Keep an Eye on the Time: Ovens vary; I often check at 25 minutes to ensure I’m not overbaking. You’re looking for that subtle golden brown, not burnt edges!
Ingredient Substitutions & Variations
Let’s get creative! If you’re looking for a budget-friendly recipe, you can swap out the walnuts for pecans, use gluten-free cake mix, or go for a dairy-free whipped topping. Want it to be a bit more nutritious? You could substitute the chocolate chips for dark chocolate for an easy high protein high calorie meal twist.
If your bananas are too ripe, consider adding some applesauce to maintain moisture while giving it a new flavor. Seasonal fruit might give it a lovely upgrade: think diced strawberries for summer or spiced candied apples in fall!
Directions
Making Banana Split Dump Cake is such a joy! Layer the bananas, cover with the dry cake mix, drizzle with melted butter, and sprinkle with chocolate chips and nuts. Bake it all at 350°F (175°C) for about 30-35 minutes or until golden brown. Let it cool slightly, and serve with whipped topping and maraschino cherries. It pairs perfectly with ice-cold milk or a scoop of vanilla ice cream. Seriously, this with a rom-com is perfection!

How to Store and Reheat Leftovers
So, if you find yourself with leftovers—first off, congrats! This rarely happens at my house, but if you do, store it covered in the fridge. The cake will stay moist and delicious for up to three days. However, I wouldn’t recommend freezing it—because the banana texture can get a bit funky upon thawing.
To reheat, just pop individual portions in the microwave for about 15-20 seconds, and voilà! Warm and gooey goodness ready to be devoured.
Make-Ahead and Freezer Tips
This delectable cake can be prepped ahead of time! Mix and layer everything up to a day in advance, and bake it the day you plan to serve it. Just remember to let the cake cool thoroughly before covering. I once wrapped one right after baking, and let’s say it didn’t turn out so pretty.
However, if you want to prep it for a future gathering, assemble and freeze it before baking. Just remember to extend your baking time a bit if it’s frozen!
Common Mistakes to Avoid
-
Not Enough Butter: Make sure to be generous with that butter drizzle. Insufficient coverage risks a dry texture, and no one likes that!
-
Overbaking: Keep checking for that golden brown coating. I once stepped away and nearly achieved ‘burnt offerings’—but thank goodness for my lifecycle in the kitchen!
-
Overripe Bananas: While bananas add sweetness, too ripe means mushy and unappetizing. Aim for firm, slightly speckled skin—trust me, that’s the sweet spot!
Frequently Asked Questions (FAQ)
Can I use other fruits instead?
Absolutely! Berries, peaches, and chopped apples work splendidly! Just make sure to adjust the baking time.
Is this gluten-free?
Not unless you use a gluten-free cake mix. Many stores have excellent options now that give the same delicious results.
Can I skip the nuts?
Of course! It’ll be just as delightful without them; you could even replace them with extra chocolate chips if you wish!
Should I keep it in the fridge?
Yes, to keep it fresh and delicious! The cool temp also allows the flavors to settle.
How do I serve it?
Serve warm, and be sure to add that delicious whipped topper before the kids can escape with the last piece!
Cooking Tools You’ll Need
- Baking Dish (9×13 is great)
- Mixing Bowls
- Measuring Cups
- Whisk (for those floury days)
- Spatula (this is crucial for layering gracefully)
Final Thoughts
This Banana Split Dump Cake is not just a dessert; it’s an ode to the beautiful messiness of life, cooking, and family memories. Every bite whispers stories and giggles shared around my table. I love how this recipe has proven to be a crowd-pleaser, a delightful mishmash of flavors that feels special every time it’s made.
If you’re feeling adventurous, share your twists on this recipe. Everyone deserves a sprinkling of love in their kitchen chaos! If you enjoyed this recipe, don’t forget to save it on Pinterest or share it with a friend! 🍌🍰🎉
Banana Split Dump Cake
Ingredients
Main Ingredients
- 3 pieces ripe bananas, sliced Not overripe; they need to be firm for the best texture.
- 1 box yellow cake mix Use your preferred brand; organic is a good option.
- 1 cup creamy whipped topping Makes every serving feel like a cloud.
- 1 cup chocolate chips Semi-sweet preferred; can use dark, milk, or white chocolate.
- 1/2 cup unsalted butter, melted Essential for binding the cake together.
- 1/2 cup walnuts (optional) Adds crunch; can be omitted if preferred.
- 1/2 cup maraschino cherries (for topping) For a classic banana split flair.
Instructions
Preparation
- Preheat your oven to 350°F (175°C).
- Layer the sliced bananas at the bottom of a 9x13 baking dish.
- Pour the yellow cake mix evenly over the banana layer.
- Drizzle the melted butter over the cake mix, covering as much as possible.
- Sprinkle chocolate chips and walnuts on top.
- Bake for 30-35 minutes until the top is golden brown.
- Allow the cake to cool slightly before serving.
- Serve warm topped with whipped topping and maraschino cherries.


