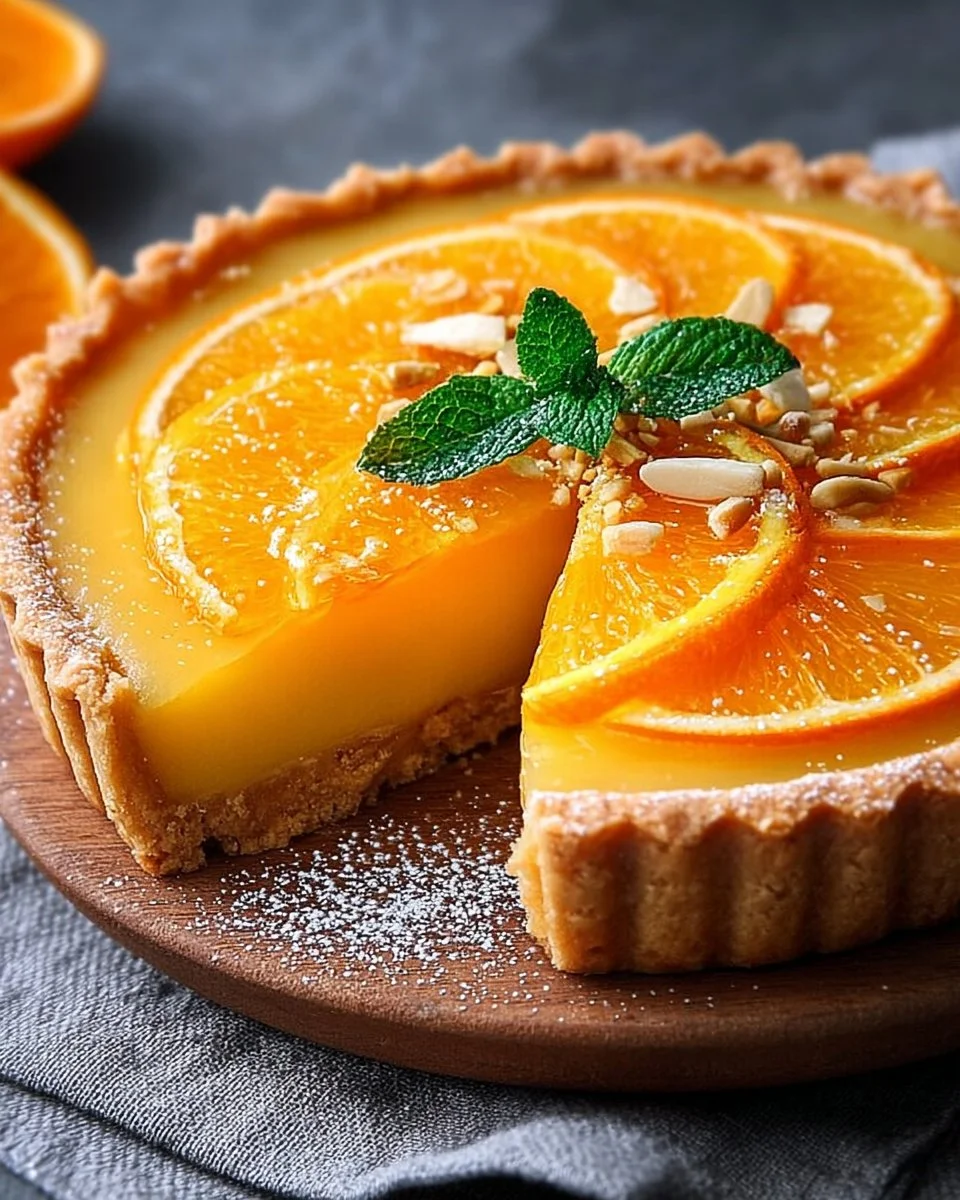
The Best Easy Orange Tart You’ll Ever Make
There I was, one crisp autumn afternoon, with my kitchen bathed in the warm, golden glow of the setting sun. The leaves outside had turned into a vibrant tapestry of red, orange, and yellow, and I found myself craving something sweet that matched the season. A tangerine tart, perhaps? Wait, no, not tangerine—like a soft punch of sunshine, an orange tart would take me there! Just the thought of a buttery crust cradling a sweet and tangy orange filling was enough to haul me out of my couch cocoon.
I still remember the first time I attempted to whip this beauty up. I had invited my best friend over for a cozy night in, complete with a classic rom-com and a whole spread of desserts. I thought, “How hard could it be? Pies and tarts are just fancy cakes, right?” Spoiler alert: I was so wrong. The crust was a cringe-worthy mess, basically a sad pile of flour and butter. I think I might have even whipped it a little too much—let’s just say I had a recipe for disaster! However, the second attempt – which is what I’m sharing today – turned out better than I’d dared to hope. Turns out, all I needed was some patience, a little finesse, and an orange zest to help me navigate this kitchen chaos.
This Irresistible Orange Tart has become a staple in our home. It’s that friend who shows up ready to share joy, dressed in sunny golden hues, and guaranteed to brighten up any gathering. It’s comforting yet elegant, and each slice is a vibrant burst of citrusy delight that plays on your palate. Perfect for any season but especially magical in the fall, it feels like a hug in a bowl.
So, if you’re in the mood for some sweet citrus magic—maybe to whip up after a long day or to impress unexpected guests—stick around. Honestly, this recipe blends simplicity with elegance, reminding you that real food doesn’t have to be fancy. Let’s dive into how we can make your own stunning Irresistible Orange Tart!
Why You’ll Love This Recipe
-
Simplicity at Its Best: Even if you’re not a seasoned baker, this recipe is straightforward and user-friendly. It’s the kind of thing that doesn’t require an army of kitchen gadgets—just you, a few bowls, and some elbow grease!
-
Bursting with Flavor: With fresh orange juice and zest in the mix, each bite transports you to a sun-soaked grove. It’s like a warm embrace from Mother Nature herself.
-
Perfect for Meal Prep: This tart can easily be baked in advance and kept in the fridge. Nothing says stress-free like having your dessert ready before your guests arrive. It’s the epitome of quick family meals.
-
Versatile Joy: Whether it’s a casual family dinner or a festive holiday gathering, this tart steals the show. It’s the dessert that pleases even the pickiest of eaters (you know who you are in your family).
-
Ideal for Leftovers: If you have any leftovers (which is a big if), it makes a fantastic breakfast treat. Don’t judge—an orange tart is fruit, right? A healthy comfort food moment!
-
Aromatherapy for the Soul: The smell of oranges filling your home is unmatched. Seriously, the only thing better is the taste you get to indulge in shortly after.
What Makes This Recipe Special?
There’s something about the aroma that starts wafting through your kitchen while you’re making this tart. As the crust bakes, you’ll smell a delightful mixture of buttery goodness mingling with the zesty fragrance of orange. Aunt Mary would always say that citrus is the scent of happiness, and I totally believe her now!
The secret lies in using fresh orange juice and zest rather than any old pre-packaged stuff—trust me, you can taste the difference. There’s a logic to this. Fresh ingredients tend to carry a soul that frozen or bottled ones simply can’t match, and this tart is no exception. Oops, I forgot to mention it should be showcased with a bit of powdered sugar on top right before serving—because who doesn’t want their dessert to look like it has winter frost on it?
This tart is not only a delicious dessert but also a canvas for creativity. You can easily riff on the base recipe to add your own signature spin. Want to play around with texture? Add a layer of creamy yogurt on top! Feel like getting nutty? Toast some almonds and sprinkle them over before serving! The possibilities are endless, and the oranges? They say thank you with every bite.
Ingredients
-
1 and 1/2 cups all-purpose flour: This forms the backbone of your tart crust. I like to use a good quality flour like King Arthur; it makes a noticeable difference!
-
1/2 cup unsalted butter, softened: Butter really is key for a flaky crust. Don’t go for margarine here—your taste buds will revolt, trust me!
-
1/4 cup sugar: This adds a slight sweetness to the crust, balancing out our zesty filling.
-
1/4 teaspoon salt: Salt enhances flavor, bringing out the sweetness of our orange filling.
-
1 egg yolk: This helps to bind everything together for a sturdy yet tender crust.
-
1/4 cup cold water: A splash of water helps the dough come together. Be careful though—too much, and it’s goopy; too little, and we’re left with flour dust clouds!
-
2 cups fresh orange juice: The heart and soul of our tart, make sure you’re squeezing those oranges fresh. Your taste buds will seriously thank you.
-
1 tablespoon orange zest: This is the secret weapon for enhancing that citrusy flavor. It brings a brightness that ties it all together.
-
3/4 cup sugar: For the filling—because we want it to be just sweet enough to balance that zesty goodness.
-
3 eggs: These help set the filling and give it a creamy texture. Plus, there’s nothing like fresh eggs from your local farm, am I right?
-
1/4 cup cornstarch: This is our thickening agent that ensures your tart filling holds together beautifully without being runny (you don’t want an orange soup!).
-
1 tablespoon butter: A final touch for richness when pouring the filling into the crust.
And just for the record—don’t skimp on the zest! It’s the magical sprinkle of sunshine that makes this tart uniquely special.
How to Make It Step-by-Step
Step 1: Preheat Your Oven
First things first, preheat your oven to 350°F (175°C). This is the magical temperature that will turn your ingredients into a glorious tart. Preheating is essential; I learned that the hard way after a few oops! moments. Nobody likes a soggy crust, right?
Step 2: Make the Tart Crust
In a mixing bowl, combine the flour, butter, sugar, and salt. I like to use my trusty pastry cutter here. A wooden spoon can totally work too, but let’s keep it real: handling flour can get messy! Mix until the mixture resembles coarse crumbs. It should look somewhat like sandy beach vibes—lovely!
When you’re satisfied with that crumbly mixture, add the egg yolk and cold water, and mix until the dough comes together. Here’s where I might have over-mixed once. The dough became tough rather than tender. Oops. Just remember to keep it soft, as we’re aiming for flaky perfection!
Now, light sprinkle some flour on your countertop, roll out the dough with your rolling pin, and gently press it into a tart pan. If it cracks a little—no biggie! Just patch it up and keep going. It’ll all bake beautifully, I promise. Remember that “perfect” doesn’t exist in my kitchen, so I’m embracing the messy. Once in the pan, prick the bottom with a fork to allow steam to escape during baking.
Step 3: Bake the Crust
Place your tart crust in the preheated oven and bake for about 15-20 minutes or until it’s a delicate golden hue. You’ll be able to smell that heavenly butter scent wafting through the air. Those aromas are like a warm hug for your senses. Give it a little peek when it gets close to the 15-minute mark—you don’t want it to turn too brown!
Step 4: Prepare the Filling
While it’s baking, let’s whip up that orange filling. In another bowl, whisk together the orange juice, zest, sugar, eggs, and cornstarch. The color is vibrant and screams “Florida sunshine”; it may look somewhat runny, but trust the process! Make sure it’s whisked until it’s smooth and well combined.
Step 5: Fill the Tart
Once your crust is baked and cooled slightly, pour the glorious mixture into the tart shell. This step gives me life; it looks so tempting! Take a moment to appreciate the color—I mean, it’s practically a work of art.
Step 6: Bake the Tart
Pop the tart back in the oven for an additional 20-25 minutes until the filling is just set in the center. It should have a slight jiggle when you take it out—think of it like a belly laugh! Once it’s out, let it sit at room temperature and cool down for a bit, which is almost the hardest part. The anticipation can get real!
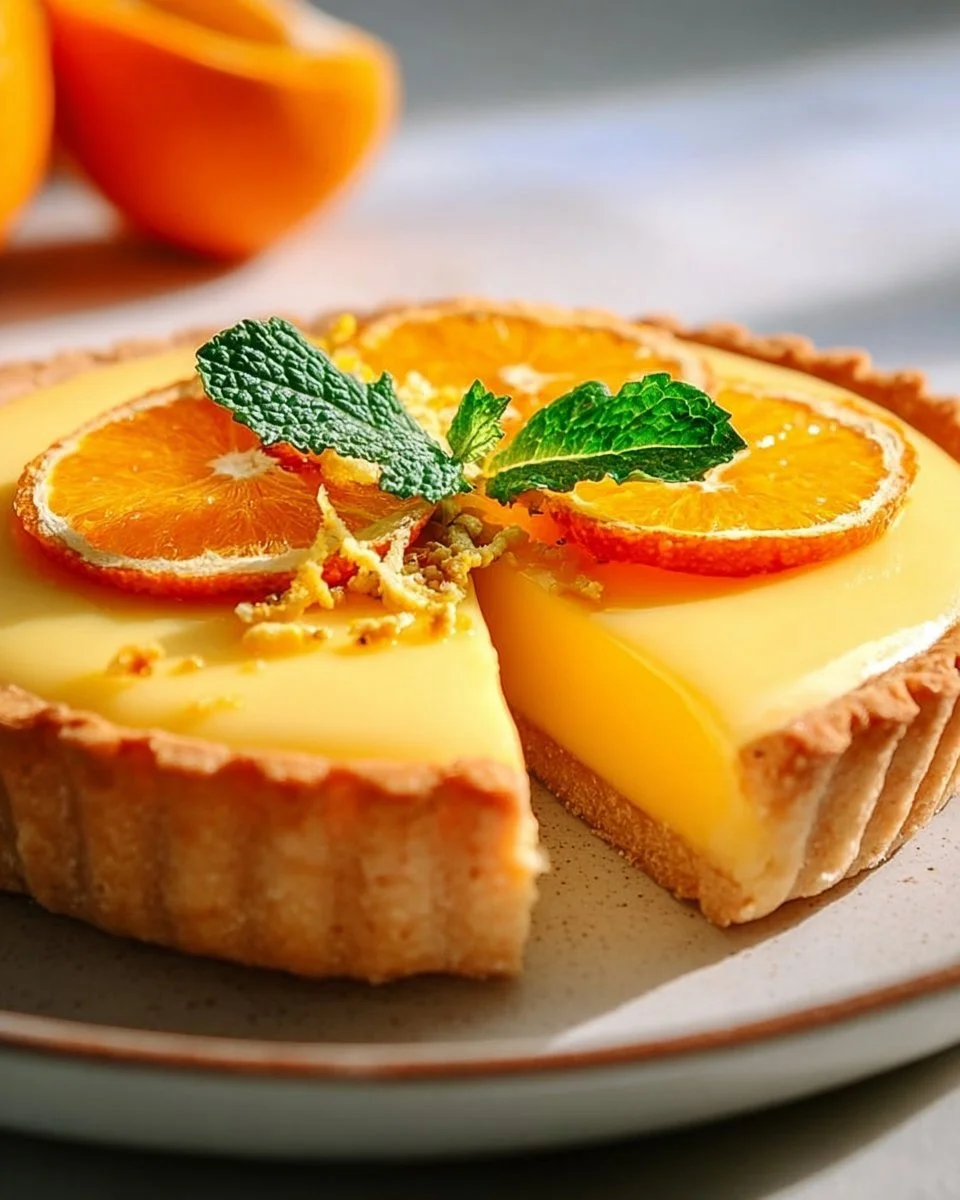
Step 7: Serve and Enjoy
Once cooled, you can sprinkle powdered sugar over the top to add a touch of elegance. Grab a slice, plate it like a true artist, and maybe serve it with a dollop of whipped cream. Seriously, this tart pairs well with just about any cozy evening—especially on those nights with rom-com classics lined up!
Tips for Best Results
-
Use Fresh Ingredients: I cannot emphasize this enough. Fresh oranges are vital to the flavor of this tart—store-bought juice just doesn’t cut it.
-
Don’t Overmix the Dough: Just knead it into shape until it’s combined. Overworking it might leave you with something more like an orange cement coaster, rather than a lovely tart!
-
Chill the Dough: If you notice your dough is too soft to handle, a little chill in the refrigerator for about 15 minutes can work wonders.
-
Watch Your Baking Time: Every oven is different, so keep an eye on your tart to avoid burnt edges.
Ingredient Substitutions & Variations
-
Gluten-Free Option: You could substitute the all-purpose flour with a blend of gluten-free flour—just make sure it’s a good quality one like Bob’s Red Mill.
-
Egg-Free Version: Flax eggs or chia seeds can stand in for the eggs if you want to go vegan. Adjust sugars or add a bit more cornstarch to help with the filling’s texture.
-
Flavor Twists: Feeling adventurous? Add a splash of vanilla extract or a hint of almond extract for a flavor boost. Or even top it with mixed berries for a twist!
Directions
- Preheat your oven to 350°F (175°C).
- In a bowl, mix flour, butter, sugar, and salt to a crumbly mixture.
- Stir in the egg yolk and cold water until a dough forms; roll out and press into a tart pan.
- Bake the crust for 15-20 minutes or until golden.
- Whisk the orange juice, zest, sugar, eggs, and cornstarch in another bowl.
- Pour the mixture into the baked crust.
- Bake for an additional 20-25 minutes until set.
- Cool before serving with powdered sugar and maybe a side of whipped cream.
Pairing Ideas (Drinks, Sides, etc.)
This tart pairs beautifully with a cup of herbal tea or a light, crisp white wine. I find that sparkling water with a twist of lime brings out those citrusy notes beautifully. And if you want to go all out? Serve it with a dollop of fresh whipped cream on the side. Dessert should always have a touch of decadence!
How to Store and Reheat Leftovers
Leftover tart can be stored in the refrigerator, covered, for about 3-4 days. The beauty of this is, most citrus flavors mature and become more vibrant the next day. Who knew that was even possible? Just serve it chilled; no need to reheat unless you want to indulge in a warm piece straight from the oven.
Make-Ahead and Freezer Tips
If you want to prep ahead, you can make the crust a day in advance. Just wrap it up tightly in plastic wrap and refrigerate. For longer storage, the unbaked crust can freeze beautifully for up to a month. Just roll it out while frozen, treat it gently, and bake it when cravings hit!
Common Mistakes to Avoid
-
Don’t Overbake: The tart should remain slightly jiggly in the center. If it’s firm all the way through, you may have accidentally cooked out the delightful texture.
-
Underestimating Cooling Time: This is the hardest part. Let it cool to allow the filling to set properly. Patience is crucial!
-
Skipping the Zest: I guiltily admit I’ve skipped zest in the past, only to be met with a blah, one-dimensional tart. Don’t miss the zing—trust in the zest!
Frequently Asked Questions (FAQ)
Can I use bottled orange juice instead?
I’d skip it if I were you! Fresh juice brings a vibrancy that bottled stuff just cannot compete with.
How long does it last in the fridge?
This tart will last about 3-4 days in the refrigerator. But let’s get real—if it’s anything like my household, it won’t last that long!
Can I freeze the orange tart?
You certainly can, but I recommend freezing the crust separately. The filling can become watery upon thawing, so it’s best enjoyed fresh.
Cooking Tools You’ll Need
- Mixing bowls
- Measuring cups and spoons
- Whisk
- Rolling pin
- Tart pan
- Pastry cutter or fork
Final Thoughts
This Orange Tart has a way of warming hearts and fulfilling sweet tooth cravings like no other. As I eat a slice while reflecting on kitchen fiascos and the occasional culinary triumph, I can’t help but feel a sense of gratitude for all the little moments: laughter shared over spoonfuls of success and the surprising camaraderie that comes from kitchen adventures.
So, if you enjoyed this recipe, don’t forget to save it on Pinterest or share it with a friend! Now go ahead and embrace your kitchen chaos with this Irresistible Orange Tart. Happy baking!

Irresistible Orange Tart
Ingredients
For the crust
- 1.5 cups all-purpose flour Good quality flour like King Arthur is recommended.
- 0.5 cups unsalted butter, softened Do not substitute with margarine.
- 0.25 cups sugar Adds a slight sweetness to the crust.
- 0.25 teaspoons salt Enhances flavor.
- 1 large egg yolk Helps bind the crust.
- 0.25 cups cold water Be cautious of the amount to ensure the right consistency.
For the filling
- 2 cups fresh orange juice Use freshly squeezed juice for best flavor.
- 1 tablespoon orange zest Enhances the citrus flavor.
- 0.75 cups sugar For sweetness.
- 3 large eggs Fresh eggs are preferred.
- 0.25 cups cornstarch Thickens the filling.
- 1 tablespoon butter For richness in the filling.
Instructions
Preparation
- Preheat your oven to 350°F (175°C).
- In a mixing bowl, combine flour, butter, sugar, and salt until the mixture resembles coarse crumbs.
- Add egg yolk and cold water, and mix until the dough comes together.
- Roll out the dough and press it into a tart pan, pricking the bottom with a fork.
- Bake the crust for 15-20 minutes or until golden.
Filling
- In another bowl, whisk together orange juice, zest, sugar, eggs, and cornstarch until smooth.
Assembly
- Once the crust is baked and cooled, pour the orange filling into the crust.
- Bake for an additional 20-25 minutes until the filling is just set in the center.
- Let it cool at room temperature before serving.
Serving
- Serve topped with powdered sugar and optionally, a dollop of whipped cream.