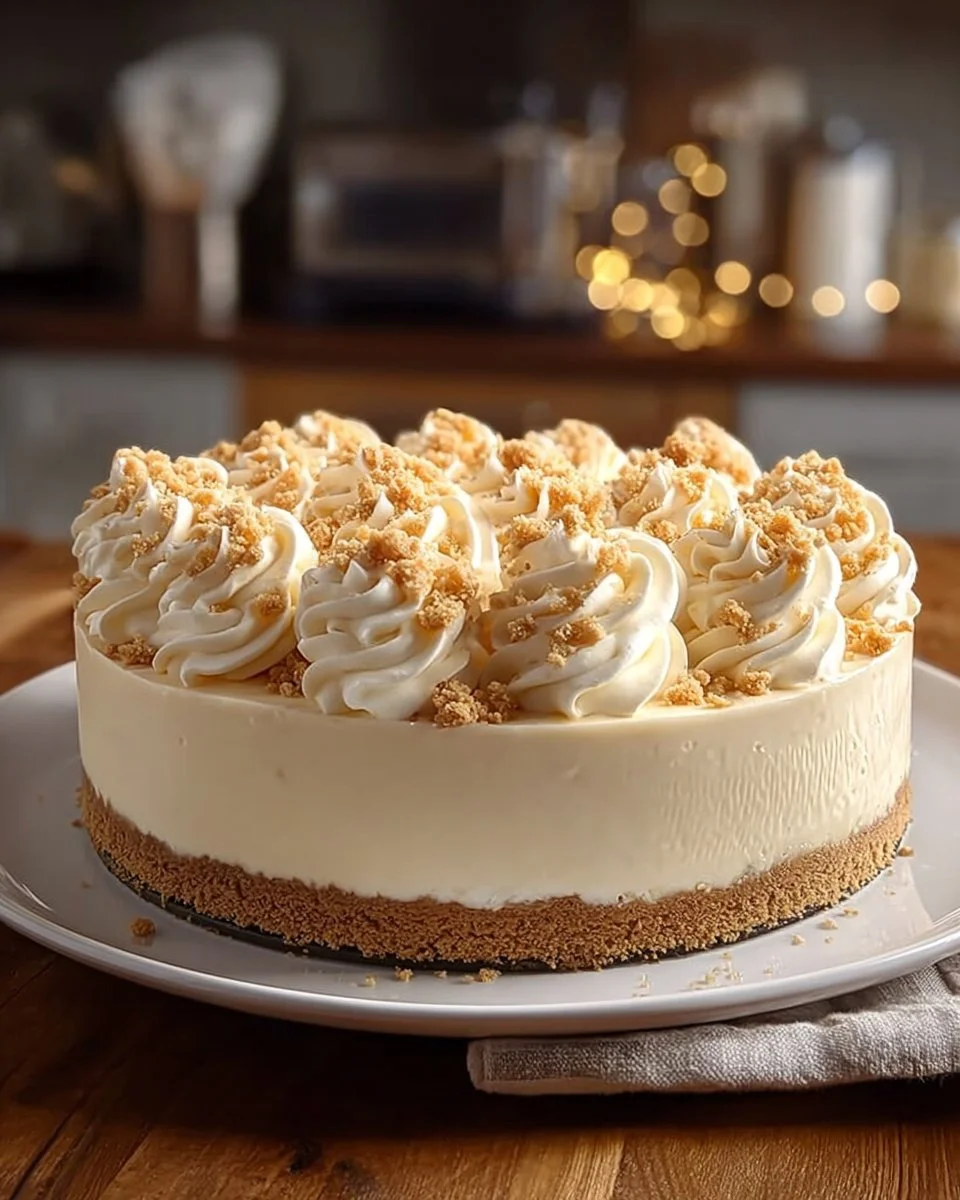
Easy No-Bake Marshmallow Whip Cheesecake: A Dream Dessert
When I think about desserts that bring pure joy, Marshmallow Whip Cheesecake pops into my mind like a sugar-fueled jingle. This easy, no-bake cheesecake is the kind of treat you whip up on a cozy evening when all you crave is something sweet and a bit indulgent. It’s one of those recipes that’s been passed around in my family like a beloved heirloom, with each generation adding its own twist. I first tried making it during a particularly chaotic summer vacation when my kids were bouncing off the walls and begging for something delicious to cap off our days of fun. To be honest, I expected a kitchen disaster but ended up creating a beautiful dessert that absolutely dazzled.
There’s something inherently comforting about biting into this cheesecake. The cool, creamy texture against that crumbly, buttery graham cracker crust is a balanced hug of flavor. I still remember those moments of lifting the first slice from the springform pan and revealing the dream-like layers beneath, my heart racing with excitement. The smell wafting from the fridge as it chilled felt like an invitation to dive right in. And honestly, every forkful was like sitting wrapped in a warm blanket on a chilly night—cozy and therapeutic in every bite. Interrupting the silence, my kids would exclaim, “More, please!” And just like that, the chaos was momentarily forgotten, replaced by sweet peace.
This cheesecake is not just a recipe. It holds memories, laughter, and endless delight. It’s been a staple at every family gathering, from birthdays to potlucks, where everyone begs for seconds and whispers about how I should really look into baking professionally—but, let’s be real, I’m just in it for the joy it brings and the laughter when things go a little sideways. Cue the mini marshmallows plopping onto the floor instead of onto the cheesecake. Oops. But hey, what’s a little mess when you have dessert to look forward to?
Why You’ll Love This Recipe
- No-Bake Simplicity: Seriously, no oven required! This dessert is perfect for lazy summer days or when you want something sweet without the heat.
- Crowd Pleaser: Friends, family, picky eaters—everyone wants a slice. This cheesecake speaks to the heart and the stomach!
- Make-Ahead Delight: It’s ready to chill overnight, which means less stress for you the day of the gathering.
- Customizable Toppings: Want to sprinkle some chocolate shavings or pile on fresh berries? Go for it! The possibilities are endless.
- Light and Airy Texture: The cream cheesiness combined with marshmallow fluff creates a melt-in-your-mouth experience. Honestly, it feels like a cloud.
- Feel-Good Factor: It’s like comfort food but in dessert form. Perfect for cozy nights in, movies, or just an evening treat after a long day.
What Makes This Recipe Special?
Ah, let’s talk about the magic ingredients! Each component of this cheesecake adds something unique and special to the overall experience. The graham cracker crust embodies nostalgia. Remember those summer campfires, roasting marshmallows, and making s’mores? Yep, that’s your first layer—comfort and sweetness intertwined.
Then there’s the cheesecake filling—oh, the filling! Cream cheese adds that creamy richness, while marshmallow fluff inserts sweetness and a fun texture, reminding you of those childhood treats. It’s a whole dessert experience in one bite! Plus, the whipped topping we fold in gives the cheesecake that airy lift—it’s deliciously fluffy!
Ingredients
To bring this magical creature of a dessert to life, you’ll need:
- 1½ cups graham cracker crumbs: For the ultimate sweet crust. Crushed up well, they should feel like sandy beach magic!
- ⅓ cup granulated sugar: Sweetness overload! A balance to the tanginess of cream cheese and richness of the fluff.
- ½ cup (1 stick) unsalted butter, melted: Because butter makes everything better—it brings the crust together, creating an irresistible crunch.
- 16 oz cream cheese, softened: Full-fat cream cheese is the heart of the cheesecake, making it creamy and dreamy!
- 7 oz marshmallow fluff (1 jar): Ah, sweet fluffiness! It adds not only sweetness but also that delightful texture we yearn for in a cheesecake.
- 1 tsp vanilla extract: A hint of vanilla elevates everything, infusing a cozy aroma that fills the kitchen.
- 1 container (8 oz) whipped topping (like Cool Whip), thawed: This is the secret to achieving that light and airy feel!
- Fresh berries, mini marshmallows, chocolate shavings or drizzle, crushed graham crackers: These are the pièce de résistance for toppings! Go wild or keep it simple—it’s up to you!
Tip: Always ensure the cream cheese is softened. If you forget and it’s cold straight from the fridge, you’ll be wrestling with lumpy cheesecake filling. Trust me; I’ve been there.
How to Make It Step-by-Step
Alright, my fellow kitchen warriors! Let’s dive into the parts that make your Marshmallow Whip Cheesecake shine.
Step 1: Make the Crust
Grab a medium bowl and your graham cracker crumbs. Sprinkle in that granulated sugar and mix it up like you’re whipping up some magic dust. Your kitchen will smell divine!
Next, slowly pour in the melted butter. Stir well until everything looks wet and sandy. It should almost feel like damp beach sand. Press this mixture firmly into the bottom of a 9-inch springform pan. I like using a measuring cup or my hands; sometimes a spatula just isn’t enough to get that nice flat surface.
Chill Alert: While you whip up the filling, pop that lovely crust in the fridge! This will help the crust firm up nicely.
Step 2: Prepare the Filling
Now for the fun part! In a large mixing bowl, dump in your softened cream cheese. Use an electric mixer or a good old-fashioned whisk (if you want a workout!) to beat it until all the lumps are gone and it’s creamy and fluffy. The kitchen should start smelling like sweet heaven!
Add in the marshmallow fluff next; try not to eat too much as you go! Seriously, it’s so hard to resist that fluffy goodness. Mix until everything is well incorporated and the batter starts turning into a luscious mixture. Ah, the texture!
Pour in that lovely teaspoon of vanilla extract. Mix again until all those beautiful flavors blend together. And, here comes the masterpiece—gently fold in the whipped topping! Use a spatula so you don’t deflate that light and airy magic you just created. You want your filling to be light and fluffy, like a marshmallow cloud!
Step 3: Assemble the Cheesecake
Time to spread that glorious cheesecake mixture over the chilled graham cracker crust! Use a spatula to even out the top, making sure there are no holes peeking through. This is when I usually stand back and admire my creation—it really starts to look fancy and feels so rewarding!
Cover the springform pan with plastic wrap, and now comes the hard part: letting it chill. Ideally, you want it to firm up in the refrigerator for at least 4 hours, but overnight is even better. The temptation to sneak a forkful is real, but trust me—it’s worth the wait!
Step 4: Decorate and Serve
The moment finally arrives! Just before serving, it’s time to jazz it up with toppings. Top with fresh berries, such as strawberries or blueberries, mini marshmallows (for that over-the-top fun), and a drizzle of chocolate sauce. If you’re feeling wild, sprinkle some crushed graham crackers for that extra crunch!
Carefully remove the springform ring—this is when I always get so excited to see my beautiful creation unveiled! Slice that cheesecake into pieces (let’s be real, there’s no “sharing” here!) and serve it chilled.
When that first bite hits the taste buds, it’s pure bliss! The creaminess wrapped in sweetness, making every savory day taste just a little better.
Tips for Best Results
- Chill Time: Don’t skip the chilling—you need it to set up properly. It’s hard, but good things come to those who wait!
- Toppings Galore: Feel free to get creative! Swap in seasonal fruits, maybe some caramel drizzle, or even crushed Oreos for a fun twist.
- Baking Disaster Backup: If something went wrong while mixing, don’t fret! Sometimes a few extra minutes of beating can save the day.
Ingredient Substitutions & Variations
You know, this cheesecake is totally forgiving and welcoming to variations. Want to cut out some sugar? Use low-sugar marshmallow fluff! Have a gluten allergy? Substitute the graham cracker crust with gluten-free crumbs. Want a chocolate twist? Use chocolate cream cheese instead of regular!
If you’re feeling particularly daring, throw in a swirl of raspberry or strawberry puree into the filling before it sets. The vibrant colors, bound to make your dessert pop!
Directions
- Make the Crust: In a medium bowl, mix graham cracker crumbs and sugar. Stir in the melted butter until well combined. Press mixture firmly into the bottom of a 9-inch springform pan. Chill in the fridge while preparing the filling.
- Prepare the Filling: In a large mixing bowl, beat the cream cheese until smooth and fluffy. Add marshmallow fluff and vanilla extract, mixing until well combined and creamy. Gently fold in the whipped topping until the mixture is light and airy.
- Assemble the Cheesecake: Spread the cheesecake mixture over the chilled crust. Use a spatula to smooth the top evenly. Cover with plastic wrap and refrigerate for at least 4 hours, preferably overnight.
- Decorate and Serve: Before serving, add your choice of toppings — fresh strawberries, mini marshmallows, or a drizzle of chocolate sauce. Carefully remove the springform ring, slice, and serve chilled.
Pairing Ideas (Drinks, Sides, etc.)
Honestly, this cheesecake dazzles all on its own. But, if you want to bring it to another level, consider serving it with a refreshing raspberry lemonade or a scoop of vanilla ice cream. Picture this: your gorgeous cheesecake, a light, bubbly drink, and perhaps a rom-com playing in the background. Perfection.
How to Store and Reheat Leftovers
If by some miracle you have leftovers (doubtful, but let’s humor the idea), keep them in an airtight container in the fridge for 3-5 days. I’ve totally tried freezing it in the past, but I found that defrosting changes that creamy texture a bit too much. So, I say stick to the fridge life!
Make-Ahead and Freezer Tips
This cheesecake is glorious with its make-ahead appeal. It can chill for up to 2 days before the big reveal. Just don’t add toppings until you’re ready to serve, or else your beautiful cheesecake might get that sad, soggy look. If you want to make it further ahead of time and try freezing, slice it first and wrap each slice tightly before freezing. Thaw in the fridge overnight before serving.
Common Mistakes to Avoid
One of the biggest oops moments I’ve had was trying to stir in cold cream cheese. Warning: lumps will happen! Make sure to soften that cream cheese, or you’ll end up hopping with frustration. And remember—chilling is key! Don’t skip it, or you might end up with a cheesecake that doesn’t hold its proud shape.
Frequently Asked Questions (FAQ)
-
Can I use low-fat cream cheese?
Sure! Just know that the texture may differ slightly, and sometimes it doesn’t set up as nicely. -
What if I don’t have a springform pan?
You can use any 9-inch baking dish. The only difference will be how you serve it. You may have to scoop it out and serve it in individual bowls—still delicious! -
Can I make this cheesecake dairy-free?
Yes! There are non-dairy cream cheeses available, and you can often find whipped coconut cream as a topping. Just ensure all your ingredients are dairy-free.
Cooking Tools You’ll Need
- Medium and large mixing bowls
- Electric mixer or whisk
- Measuring cups and spoons
- Springform pan (or standard baking dish)
- Spatula
- Plastic wrap (for chilling)
Final Thoughts
As I sit here and reminisce about all the happy moments spent wandering through the world of desserts, I can’t help but feel a warm rush of gratitude for this Marshmallow Whip Cheesecake. It’s a recipe that proves some of the best moments in cooking happen amidst the flops and flour hurricanes, crafting culinary chaos into colorful creations of joy.
Whether you’re creating memories with loved ones or sneaking in a treat just for yourself (you deserve it!), I hope this cheesecake brings you as much happiness as it has brought to my family. Experiment, share stories, and feel free to leave your own personal touches—it’s what makes this dessert truly yours.
If you enjoyed this recipe, don’t forget to save it on Pinterest or share it with a friend!
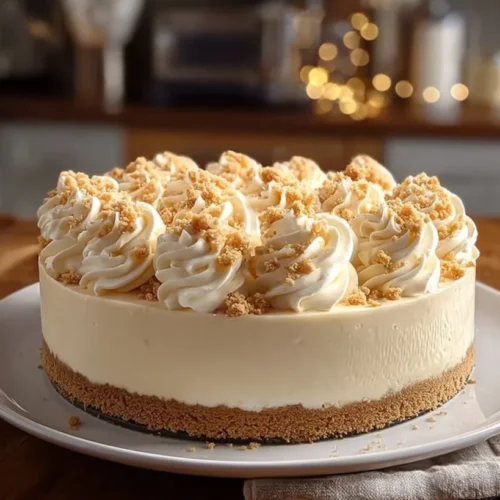
Marshmallow Whip Cheesecake
Ingredients
For the crust
- 1.5 cups graham cracker crumbs Crushed well to create the crust.
- ⅓ cup granulated sugar Balances the flavors of the crust.
- ½ cup unsalted butter, melted Helps bind the crust together.
For the cheesecake filling
- 16 oz cream cheese, softened Full-fat cream cheese for the best texture.
- 7 oz marshmallow fluff Adds sweetness and texture.
- 1 tsp vanilla extract Enhances flavor.
- 8 oz whipped topping, thawed Makes the filling light and airy.
For toppings
- to taste fresh berries, mini marshmallows, chocolate shavings or drizzle, crushed graham crackers Optional toppings to personalize your cheesecake.
Instructions
Make the Crust
- In a medium bowl, mix graham cracker crumbs and sugar. Stir in the melted butter until well combined.
- Press the mixture firmly into the bottom of a 9-inch springform pan. Chill in the fridge while preparing the filling.
Prepare the Filling
- In a large mixing bowl, beat the cream cheese until smooth and fluffy.
- Add marshmallow fluff and vanilla extract, mixing until well combined and creamy.
- Gently fold in the whipped topping until the mixture is light and airy.
Assemble the Cheesecake
- Spread the cheesecake mixture over the chilled crust. Use a spatula to smooth the top evenly.
- Cover with plastic wrap and refrigerate for at least 4 hours, preferably overnight to set.
Decorate and Serve
- Before serving, add your choice of toppings such as fresh berries, mini marshmallows, or a drizzle of chocolate sauce.
- Carefully remove the springform ring, slice, and serve chilled.