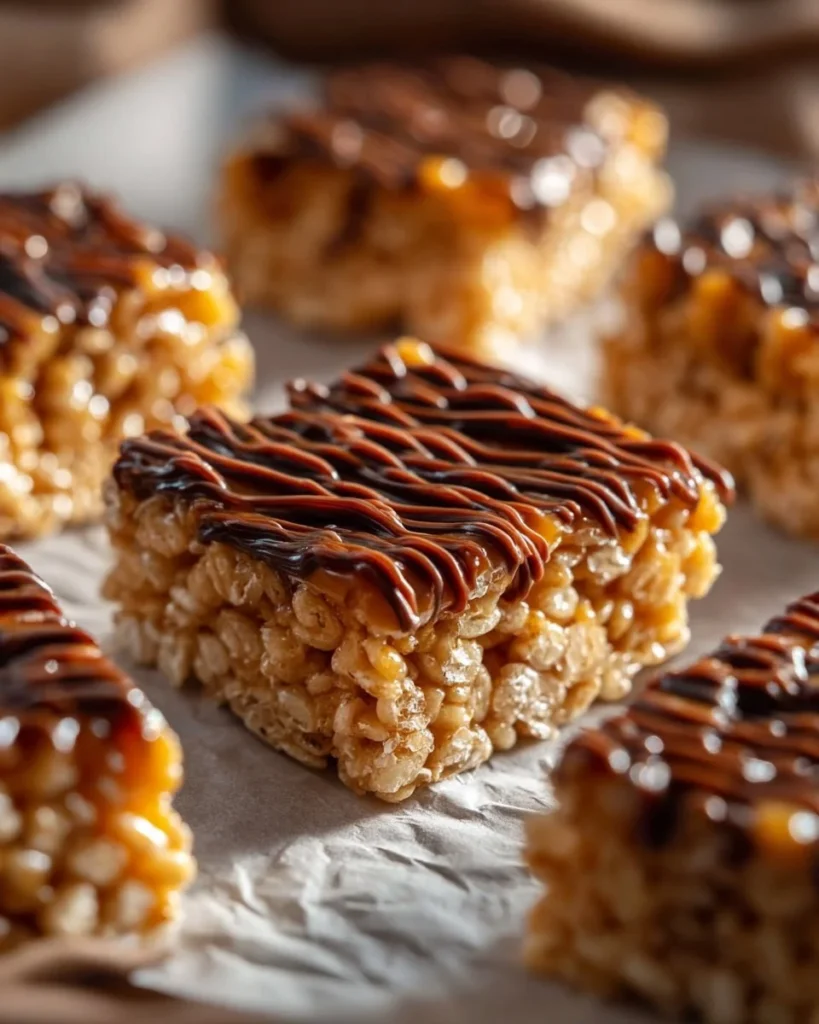

Easy Salted Caramel Rice Krispie Treats: A Sweet & Salty Indulgence
As I sat in my cozy kitchen, the scent of warm, melting marshmallows wafted through the air, wrapping around me like a comforting blanket. Honestly, there’s just something about Rice Krispie treats that transports me directly to my childhood—think sleepovers, late-night snacks, and messy hands. They were a staple, a quasi-ritual in my house. Whenever my mood dipped or a sweet tooth whispered to me in the evening, they were my recipe of choice.
This particular version, enhanced with rich, gooey salted caramel and a drizzle of luscious chocolate, adds a delightful twist that elevates this childhood favorite. The sweet and salty combo feels new yet so familiar.
Growing up, I remember the first time I attempted to make traditional Rice Krispie treats all by myself. I had watched my mom whip them up with such ease; it looked so simple! And there I was in the kitchen, convinced I could do it, too. Well, spoiler alert: I didn’t realize how sticky everything would get. My hands, my hair, the kitchen counter—everything was a marshmallow disaster. But, as the old saying goes, practice makes perfect. Fast forward a few years—this time, I’m not just making plain treats; I’m conquering the sweet and salty universe with this simple recipe.
In a world of easy weeknight dinners and quick family meals, this recipe for Salted Caramel Rice Krispie Treats holds a special place. It’s incredibly simple, thoughtful, and, most importantly, it wraps you in a warm hug of nostalgic flavors. Trust me when I say this dish is what you need for cozy nights in or gatherings with friends. So, let’s dive into how we can create this sweet and salty indulgence together.
Why You’ll Love This Recipe
- Quick and Easy: Seriously, this is one of those recipes where you can throw everything together in less time than it takes for a microwave meal. After all, aren’t quick family meals the best kind?
- Perfect Balance of Flavors: The beautiful mingling of sweet caramel, buttery marshmallows, and a sprinkle of sea salt creates a taste experience that feels familiar yet utterly divine.
- Great for Leftovers: If you happen to have any leftovers (you might want to hide them!), they store really well. And who doesn’t love snacking on sweet treats while binge-watching their favorite show?
- Picky-Eater Approved: Kids love the classic marshmallow flavor, and the updated salted caramel version is sure to impress the adults too. It’s a win for the whole family!
- Endless Customization: Feeling adventurous? You can add different candies, nuts, or even sprinkle in some crispy bacon for that sweet-and-savory fusion.
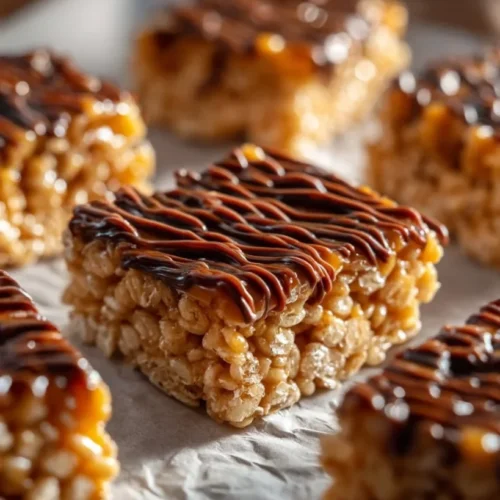
- Beautiful Presentation: With the chocolate drizzle and a sprinkle of sea salt, these treats will wow your guests. Who knew budget-friendly recipes could be so chic?
What Makes This Recipe Special?
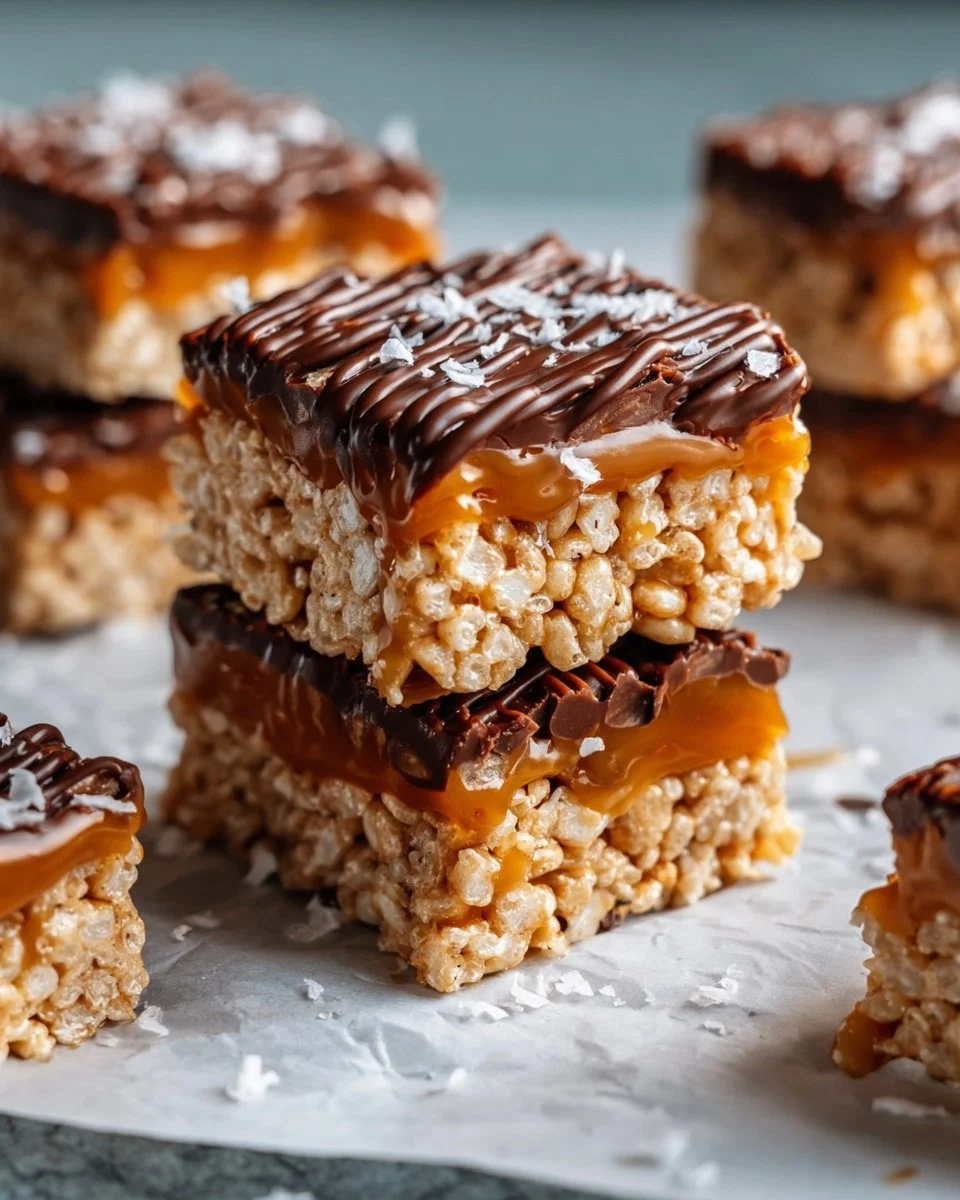
What sets this recipe apart is the addition of the salted caramel layer, transforming the normally straightforward Rice Krispie treat into a fancy dessert. Remember that pause before taking a bite, where you can almost see the layers of texture and flavor underneath the shiny caramel? Yeah, it’s that good. It isn’t just a snack; it’s an experience.
This recipe draws inspiration from my love of contrasting flavors. Sweet and salty played against each other offers that satisfying range of taste that keeps your palate guessing. Plus, the feeling of nostalgia in every bite—ah, it truly makes me appreciate those little moments of joy in life. We’re taking something ordinary and giving it a sparkling twist just like a shimmering surprise in a favorite easy high-protein high-calorie meal.
So, armed with a few simple ingredients, let’s embark on making these scrumptious Salted Caramel Rice Krispie Treats.
Ingredients
- 5 tablespoons butter: The base for our gooey treats, adding richness and that delectable buttery flavor.
- 10 ounces marshmallows: The heart of our treats—chewy and sweet! Use either mini marshmallows or regular. Honestly, I prefer the mini ones for better distribution.
- 5 cups Rice Krispie cereal: The crisp, airy texture that gives these treats their unique snap! Just don’t try a handful before mixing; it’s too tempting, I admit!
- 1 teaspoon vanilla extract: A splash of vanilla elevates the flavor profile, giving us that delightful aroma that fills the kitchen.
- 10 ounces caramels or caramel bites, unwrapped: For that irresistible gooey caramel layer. I love using Kraft caramels—they melt beautifully!
- 1 (14-ounce) can sweetened condensed milk: A secret ingredient that gives our caramel a creamier consistency, ensuring it’s lavish and dreamy.
- 5 tablespoons butter (for the caramel): Adding richness to the caramel layer that’s just too lovely to pass up.
- ½ cup heavy cream: For our chocolate drizzle! This will make the chocolate melt beautifully and add that luxurious finish.
- 6 ounces milk chocolate chips: Because chocolate makes everything better.
- Sea salt (for garnish): Essential for that pop of flavor. Don’t skip this; it ties everything together in mouthwatering harmony.
Before we get cooking, let me give you a little tip: if you’re feeling adventurous, consider sprinkling in some chopped nuts or pretzels for added texture and surprise. We are all about the layers, right? But let’s not jump too far ahead—here comes the fun stuff!
How to Make It Step-by-Step
Okay, let’s get our hands messy! This is where the magic happens, but be warned—you might have a little fun along the way. Just embrace the chaos, okay?
-
Butter Your Baking Dish: Grab your trusty 9×13-inch baking dish and give it a generous coating of butter. Not only does this help keep things from sticking, but it also adds a little extra flavor. Seriously, butter makes everything better.
-
Melt the Marshmallows: In a large saucepan over medium heat, melt those 5 tablespoons of butter. Keep an eye on it—don’t let it burn! As the butter starts to melt, toss in the marshmallows. Stir continuously until they’re completely melted and smooth, a cloud of sweetness forming before you. Ah, this is the good stuff!
-
Stir in the Vanilla: Remove your gooey marshmallow mixture from heat and stir in the vanilla extract. You should get a lovely wave of fragrance right about now that’ll make your heart smile.
-
Mix in the Rice Krispies: Now, gently fold in the Rice Krispie cereal. This step can get a bit messy, but you want to make sure every little piece is coated in marshmallow goodness. Pro tip: use a large spatula for better handling. Oops, the Rice Krispies are trying to escape!
-
Press into the Dish: Once the cereal is adequately coated, it’s time to press the mixture into the prepared baking dish. Try not to pack it too tightly. You want your treats to remain chewy!
-
Make the Caramel: In another saucepan, combine the sweetened condensed milk, 5 tablespoons of butter, and unwrapped caramels. Melt over medium heat, stirring continuously. You’ll know it’s ready when everything is smooth and beautifully combined. Don’t leave it unattended unless you want a sticky situation, literally.
-
Spread the Caramel: Carefully pour the caramel mixture over the Rice Krispie base. Take your time to spread it evenly. This is where the magic happens—the sweet layers start taking shape!
-
Sprinkle with Sea Salt: Remember that generous sprinkle of sea salt from earlier? Go ahead, let it rain! This step is what makes our salty caramel layer extra succulent. Allow the caramel to cool for about 15 minutes while you try not to sneak a taste.
-
Create the Chocolate Drizzle: In a small saucepan, heat the heavy cream over medium heat until it just starts to bubble. When you see those little bubbles popping up, remove it from the heat. Place those milk chocolate chips in a separate bowl and drizzle the warm cream over them. Stir gently until you get a smooth, thick sauce. Perfection!
-
Drizzle and Finish: After a few minutes, drizzle that delightful chocolate mixture over the caramel layer and sprinkle a touch more sea salt for good measure. Feel free to admire the beauty before you, too.
-
Let it Cool: Patience, my friend! You want the treats to set completely. This usually takes about 1-2 hours—if you can resist the urge to taste too early!
I can guarantee there will be a slippery marshmallow or two that sneak in as you clean up. Embrace the mess because that’s part of the joy of cooking!
Tips for Best Results
- Make sure to butter your hands when pressing the mixture into the pan; it will help prevent that sticky disaster.
- If you find your caramel is too thick, add a splash of cream to loosen it up a bit.
- For added texture and flavor, try mixing in a handful of crispy treats or even peanut butter melted into the marshmallows.
- Let the chocolate cool for a few minutes before drizzling, so it holds its shape and looks gorgeous.
Ingredient Substitutions & Variations
- Marshmallows: If you want a more artisanal touch, try using homemade marshmallows; they may change the texture, but the flavor is outstanding!
- Caramels: If you can’t find caramels, you can use a homemade caramel sauce, but be careful not to make it too runny!
- Chocolate Chips: Switch it up with dark chocolate or even white chocolate for different flavor profiles, depending on your preference.
- Nuts/Pretzel Bits: Add in some chopped pecans, walnuts, or crunchy pretzel bits for some bite to your treats!
Directions
- Butter a 9×13-inch baking dish.
- In a large saucepan, melt 5 tablespoons of butter over medium heat. Add marshmallows, stirring until melted and smooth. Remove from heat and stir in vanilla.
- Fold in Rice Krispie cereal, mixing until evenly coated. Press mixture into the prepared baking dish.
- In a separate saucepan, combine sweetened condensed milk, 5 tablespoons butter, and caramels. Melt over medium heat, stirring until smooth. Pour over the Rice Krispie base and sprinkle with sea salt. Let cool.
- Heat heavy cream until bubbling, then pour over chocolate chips in a bowl. Stir until smooth. Drizzle chocolate over cooled caramel layer and sprinkle with more sea salt.
- Allow to set (about 1-2 hours) before cutting into squares. Enjoy!
Pairing Ideas (Drinks, Sides, etc.)
Now that you have these mouthwatering Salted Caramel Rice Krispie Treats ready to go, you might be wondering what to pair them with. Here are a few ideas that I always find delightful:
- A rich cup of coffee: The bitterness of the brew contrasts with the sweetness perfectly!
- A creamy glass of milk (because who doesn’t love childhood nostalgia?).
- Ice cream on the side, vanilla, or caramel-flavored—talk about a sweet symphony!
- If you’re feeling adventurous, why not pair it with a fruity cocktail for an adult gathering? Imagine a lemon drop martini; the zing is fantastic alongside those sweet treats!
How to Store and Reheat Leftovers
Storing these beauties properly is crucial to keep them fresh. Once they’re set, slice them into squares and store them in an airtight container. They can sit at room temperature for a couple of days or shift them to the fridge for an extended stay.
Reheating? Honestly, it’s best enjoyed straight out of the container as they lose a bit of that delightful texture when heated. But if you must, briefly microwave for about 5 seconds. Just keep an eye on it—you don’t want an ooey-gooey situation on your hands!
Make-Ahead and Freezer Tips
You can prepare the Rice Krispie base and the caramel layer a day ahead. Just pop everything into the fridge until you’re ready to add the chocolate layer.
If you end up with leftovers (which I seriously doubt), they freeze beautifully! Wrap each piece individually in plastic wrap, then transfer them to a freezer bag. To thaw, let them sit at room temperature for a bit.
Common Mistakes to Avoid
- Letting the Butter Burn: For real, watch your melting butter! If you scorched it, your treats will have a slight burnt flavor. Not ideal!
- Packing the Rice Krispies Too Tight: Remember to light-handedly press them into the pan. They need a little room to breathe!
- Skipping the Sea Salt: Trust me; this detail is non-negotiable! It transforms your treat from something good to something unbelievably special.
Frequently Asked Questions (FAQ)
- Can I substitute the marshmallows? While traditional marshmallows are the best for a classic texture, you could use homemade ones if you’re feeling ambitious.
- What if my caramel is too thick? Add a splash of cream to loosen it. Stir until it reaches a pourable consistency.
- Can I make these vegan? Yes! Substitute dairy products with vegan alternatives—look for vegan marshmallows and coconut cream for a delicious twist.
Cooking Tools You’ll Need
- Large saucepans
- Mixing spatulas
- A buttered 9×13-inch baking dish
- Microwave-safe bowls
- Airtight storage containers
Final Thoughts
As you embark on this delicious journey of making Salted Caramel Rice Krispie Treats, remember it’s about embracing the sweet chaos in the kitchen, experiencing those wonderful scents, and ultimately sharing the joy with those you love. This recipe captures memories and creates new ones, bringing warmth and comfort with each bite.
I hope you give this a shot; it truly is more than a dessert—it’s a celebration of life’s sweet moments. If you enjoyed this recipe, don’t forget to save it on Pinterest or share it with a friend! Let’s keep spreading that joy, one treat at a time!
Salted Caramel Rice Krispie Treats
Ingredients
For the Rice Krispie Base
- 5 tablespoons butter For greasing and adding richness.
- 10 ounces marshmallows Mini or regular marshmallows can be used.
- 5 cups Rice Krispie cereal The base texture for the treats.
- 1 teaspoon vanilla extract Enhances flavor.
For the Salted Caramel Layer
- 10 ounces caramels or caramel bites, unwrapped Kraft caramels are preferred.
- 1 14-ounce can sweetened condensed milk Creates a creamier caramel.
- 5 tablespoons butter For richness in the caramel layer.
- 1/2 cup heavy cream For the chocolate drizzle.
For the Chocolate Drizzle
- 6 ounces milk chocolate chips Enhances the overall flavor.
- Sea salt for garnish Essential for flavor balance.
Instructions
Preparation
- Butter a 9x13-inch baking dish.
- In a large saucepan over medium heat, melt 5 tablespoons of butter. Add marshmallows, stirring until melted and smooth.
- Remove from heat and stir in vanilla extract.
- Gently fold in Rice Krispie cereal, mixing until evenly coated. Press the mixture into the prepared baking dish.
Caramel Layer
- In another saucepan, combine the sweetened condensed milk, 5 tablespoons of butter, and unwrapped caramels. Melt over medium heat, stirring until smooth.
- Pour the caramel mixture over the Rice Krispie base and sprinkle with sea salt. Let it cool for about 15 minutes.
Chocolate Drizzle
- Heat the heavy cream until bubbling, then pour it over the chocolate chips in a bowl. Stir until smooth.
- Drizzle the chocolate over the cooled caramel layer and sprinkle with more sea salt.
Finishing Touch
- Allow the treats to set for about 1-2 hours before cutting into squares.